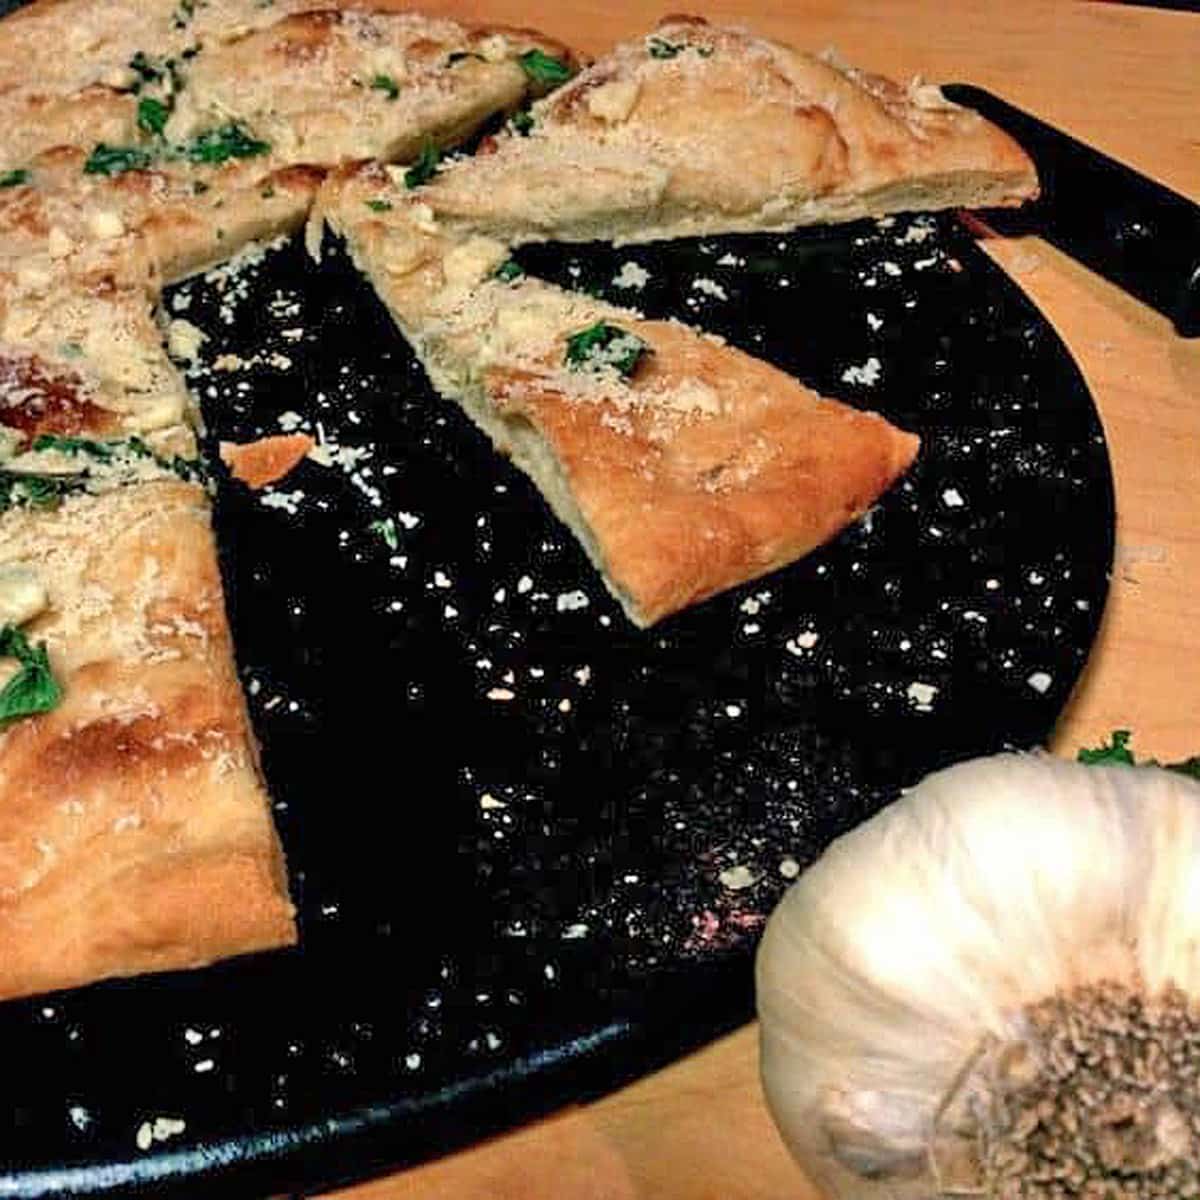
The BEST Garlic Pizza (with Easy Homemade Crust)
Updated Aug 11, 2025
This post may contain affiliate links. Please read our disclosure policy.
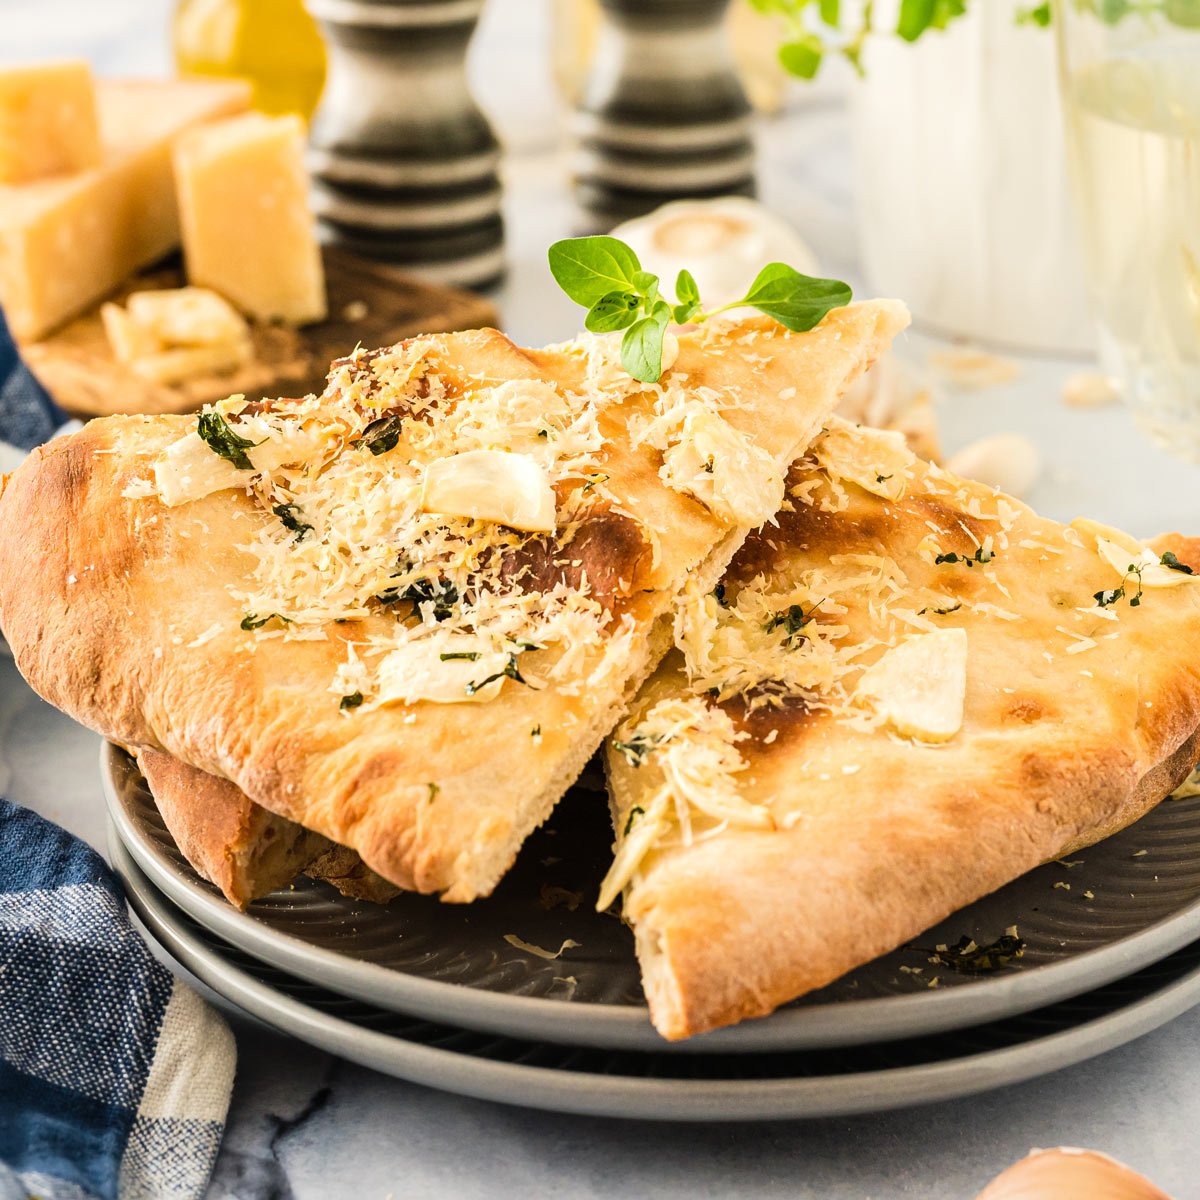
Garlic pizza is one of my favorite homemade pizza recipes. With this easy recipe that uses just a few simple ingredients, I’m going to show you how to make the best pizza in town.
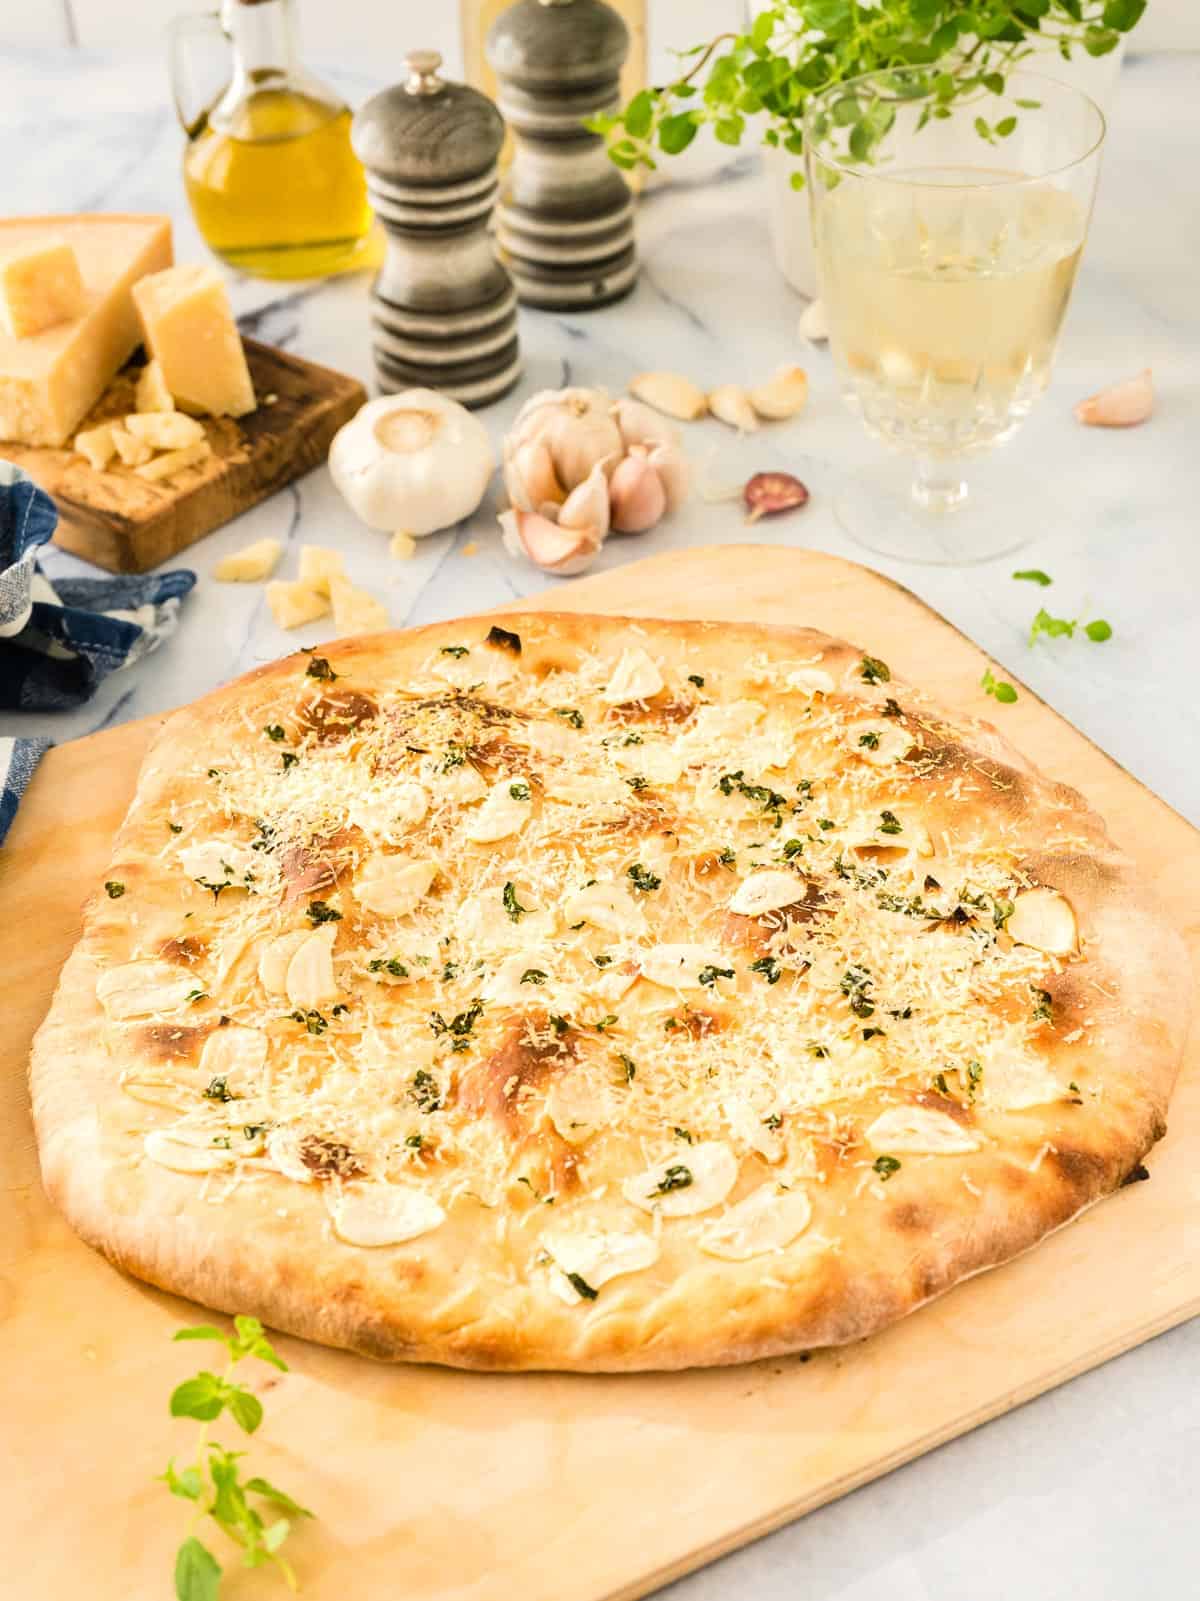
The best part of all: You can make this easy pizza for just a couple of dollars in your kitchen. Read on and I’ll introduce you to what I consider to be one of the best foods on earth: Fresh homemade pizza!
Table of Contents
ℹ️ About this garlic pizza
When I was a kid, the only pizza we made came from a box came. It contained a small, unlabeled can of sauce, a pouch of pizza mix, and a very small bag of grated Parmesan cheese.
I thought that pizza was special back then. It seems like we only had it on Sunday nights, somewhere between watching the Wonderful World of Disney and Wild Kingdom.
Like the boxed pizza I used to enjoy on Sunday nights with my parents and brothers, and sisters, this homemade pizza recipe is as basic as it gets. That’s one of the things that make it so good.
However, that is where the similarities end.
The other two things that take it to the next level:
- It’s made from scratch and
- You make it using fresh ingredients.
If you stop and think about it, aren’t all those things important in the best food?
Another thing that makes this garlic pizza better than the rest is the homemade crust. This is the base of any pizza, which makes it the most crucial part.
Back when bread-making machines were all the rage, I discovered that I could make really good pizza dough in one of those machines.
Sometime later, inspired by chef Mario, I started to use his pizza dough recipe, and it has stuck with me for years. I can’t wait to show you how easy this is to make!
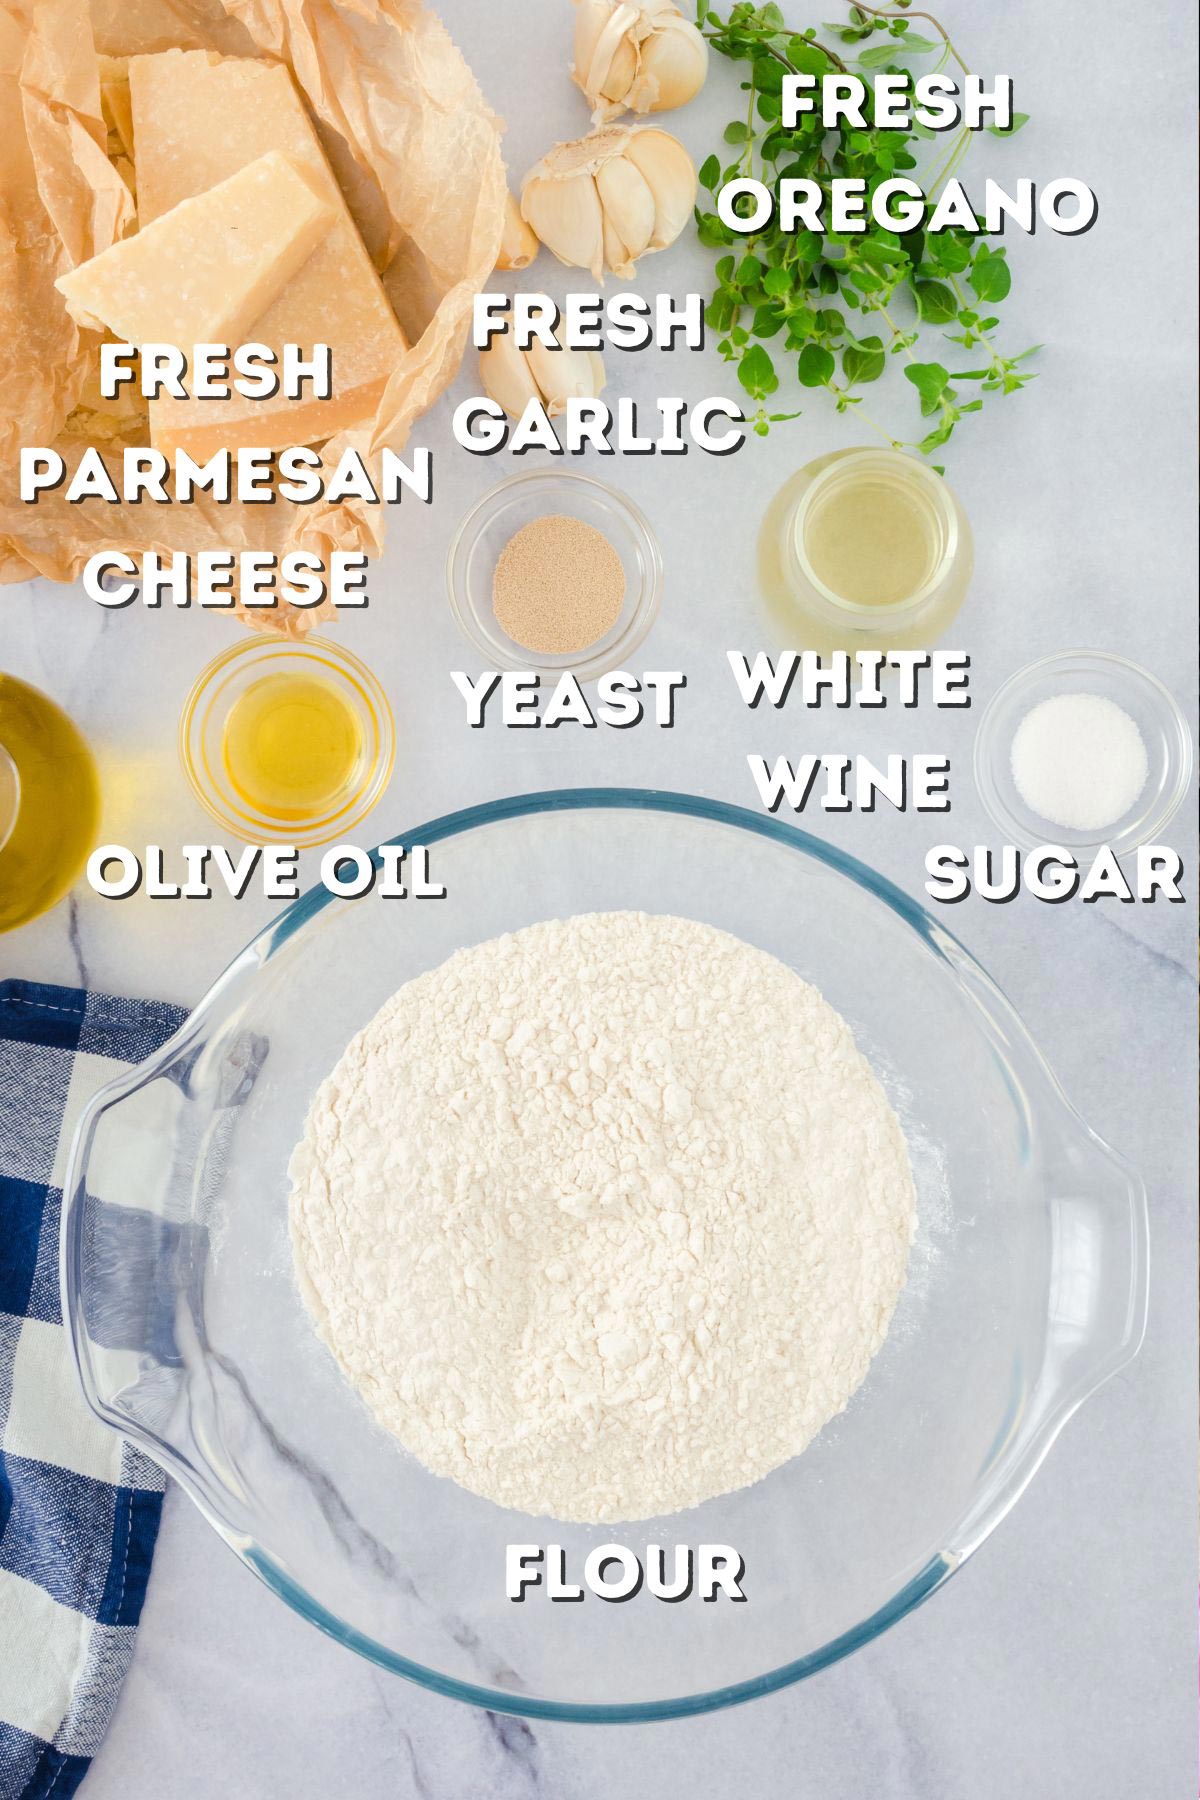
🧄 Ingredients and notes
This garlic pizza recipe is made with homemade pizza dough, which includes flour, yeast, salt, and honey or sugar. The dough is moistened with extra virgin olive oil and can be flavored and sweetened with a touch of honey or sugar.
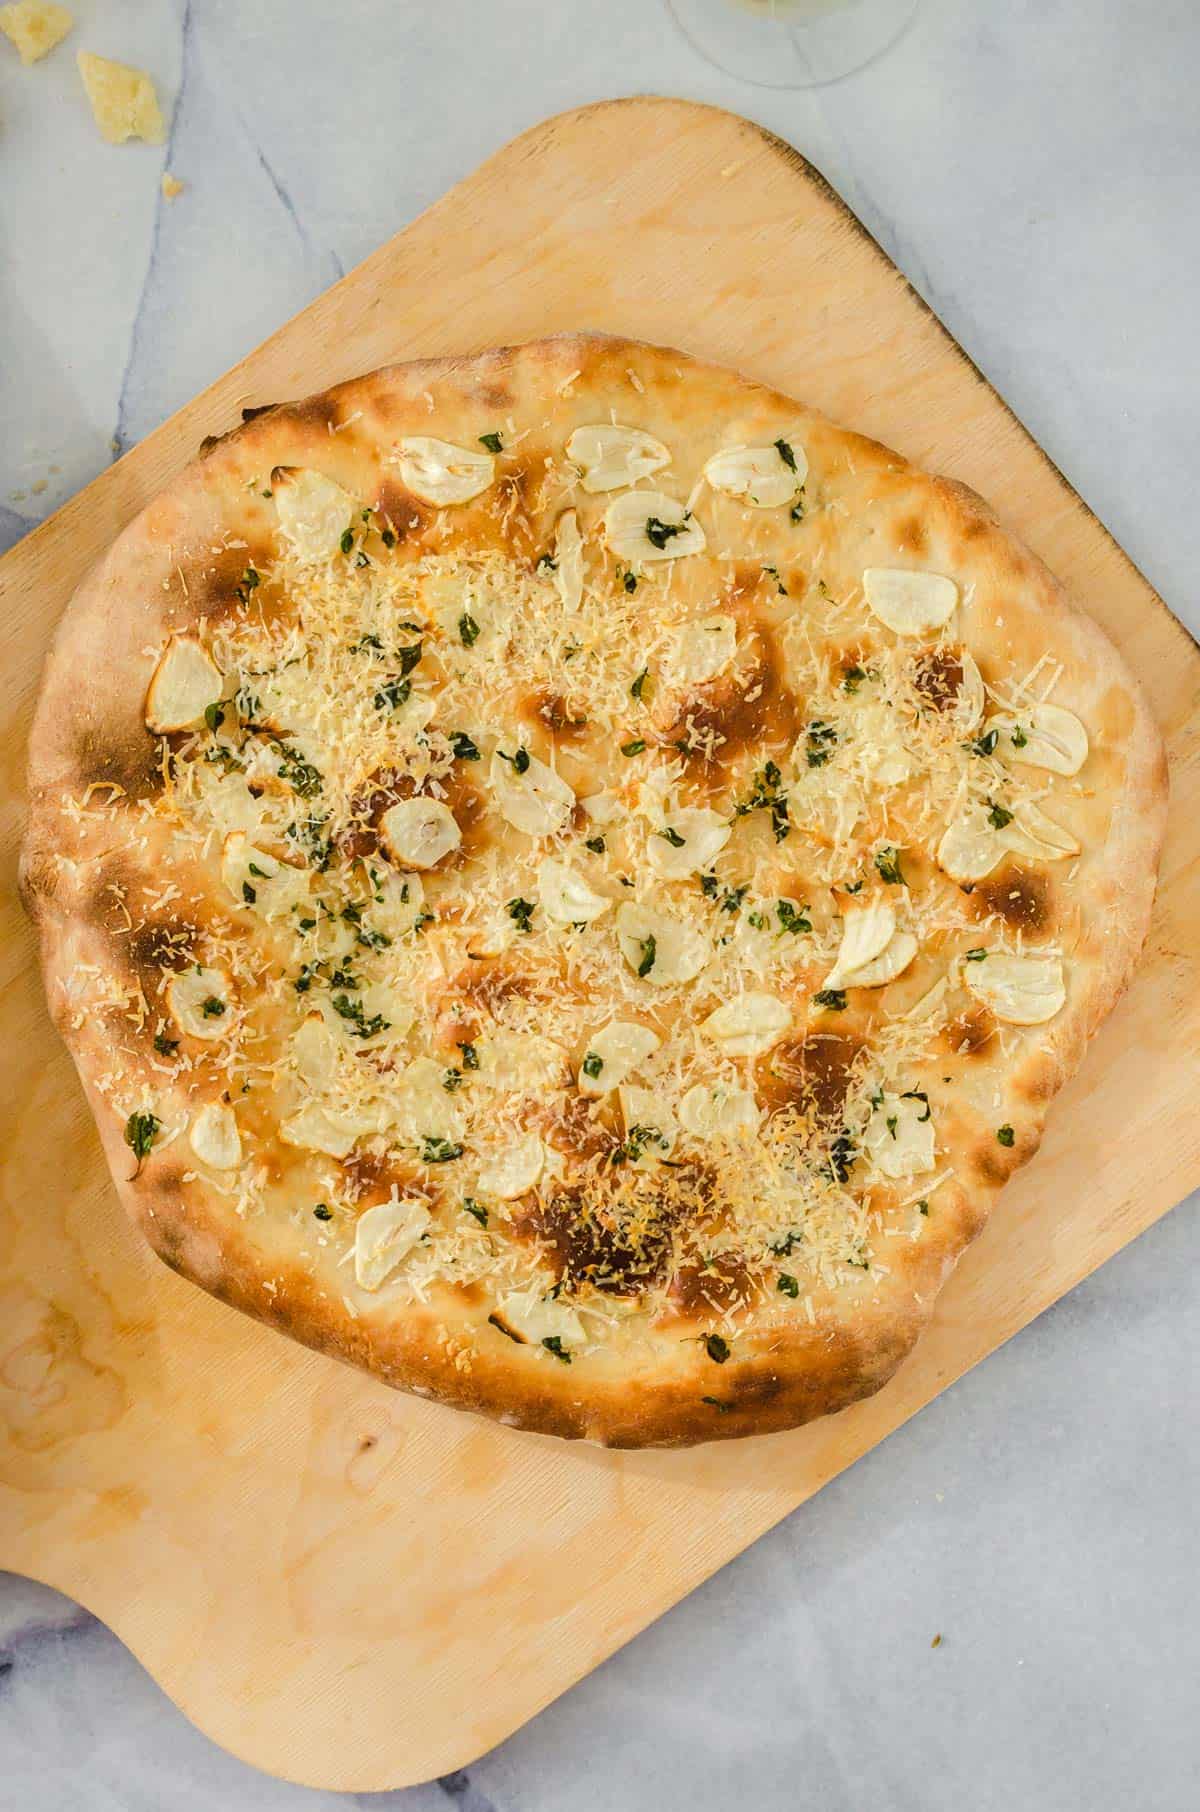
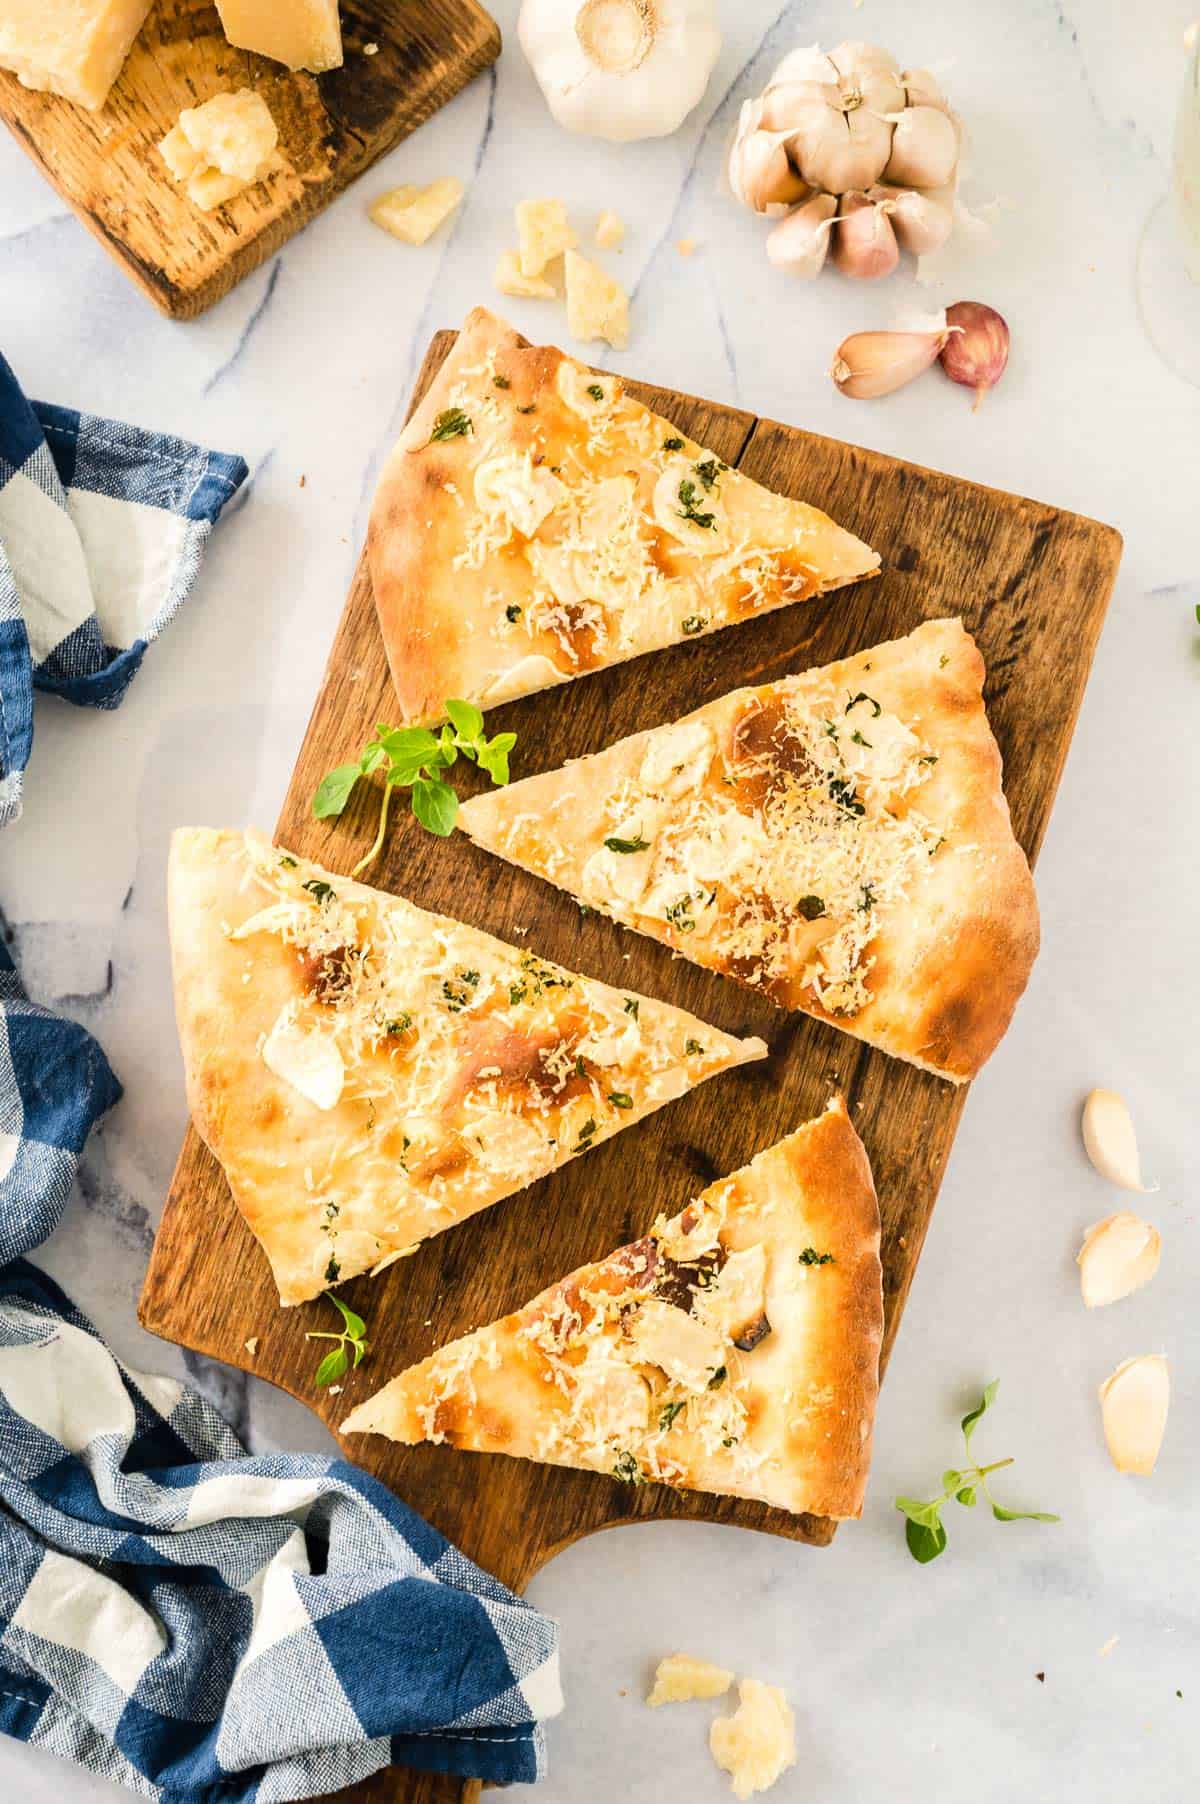
For toppings, we keep it simple with slices of fresh garlic cloves and fresh oregano leaves. As a finishing touch, the whole thing gets a dusting of freshly grated Parmesan cheese!
- Flour: This is the main ingredient in the pizza dough. Use all-purpose flour for a classic crust, or experiment with whole wheat or gluten-free flour for a healthier option.
- Salt: Adds flavor to the dough and helps regulate yeast activity. I like to use kosher salt of its big chunky crystals.
- White wine: This adds a slightly sweet and fruity flavor to the dough. Use dry or sweet, whatever you have on hand. If you want, you can substitute water for this as well.
- Extra virgin olive oil: This will kick-start the flavor of the crust, and you can also brush some on the crust to give it a nice brown glow when it comes out of the oven.
- Honey or sugar: This will help feed the yeast and add sweetness to the crust. I prefer honey over sugar for this garlic pizza recipe!
- Yeast: The leavening agent that makes the dough rise. Active dry yeast is what I usually use when making this.
- Milk (or more wine on reserve): This adds a creamy richness to the dough, and once again, you can use water instead.
- Fresh oregano leaves: (Coarsely chopped) This fragrant Italian herb is a classic to Italian cooking and will give your garlic pizza a nice savory finish.
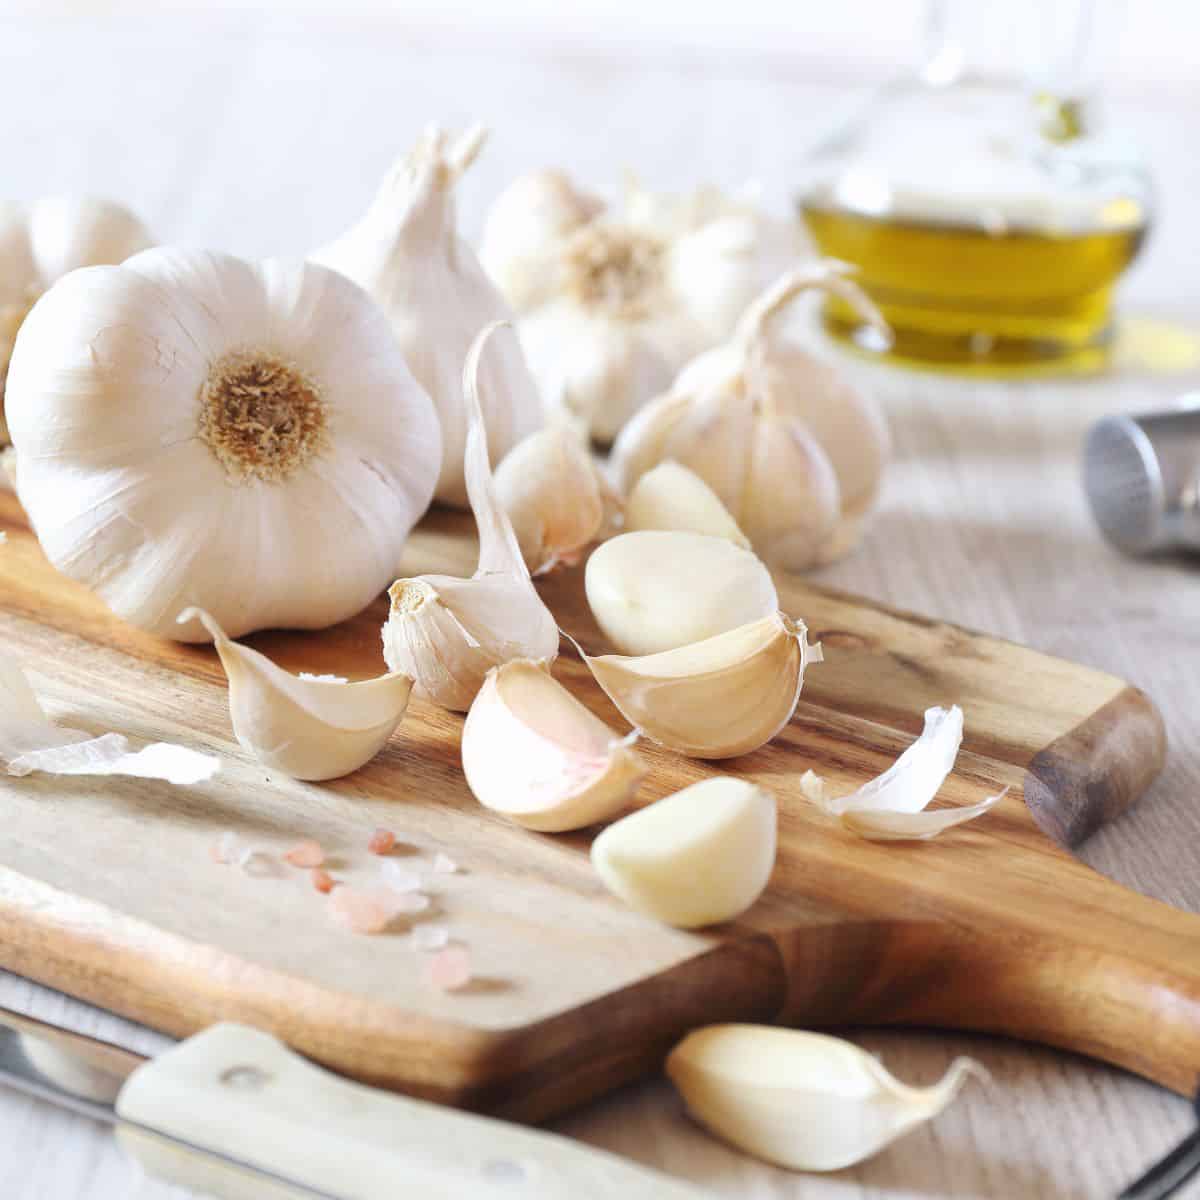
- Garlic: Thinly sliced cloves make this garlic pizza will add a pungent and savory tone, providing its signature flavor. I prefer fresh garlic, and use plenty of it! You’ll find it featured in many of our recipes like authentic guacamole, garlic edmame, creamy garlic meatballs, roasted garlic and caulflower soup, and so many more!
- Parmesan cheese: Fresh grated. Sprinkle this flavorful salty cheese on the garlic pizza to seal the deal!
Pro Cooking Tip: Proof the Yeast
Be sure and proof your yeast before using it to make sure it is still good! We show you in detail how to do this with our homemade crusty bread recipe. If your yeast is old and dead, your crust won’t rise and you will be very sad!
🍕 How to make garlic pizza
(See the full recipe at the end of this post.)
We’ll make this garlic pizza in a couple of different stages. First, we make the dough for the crust, and then we let it rise. If you’re using a store-bought crust, you can skip this part.
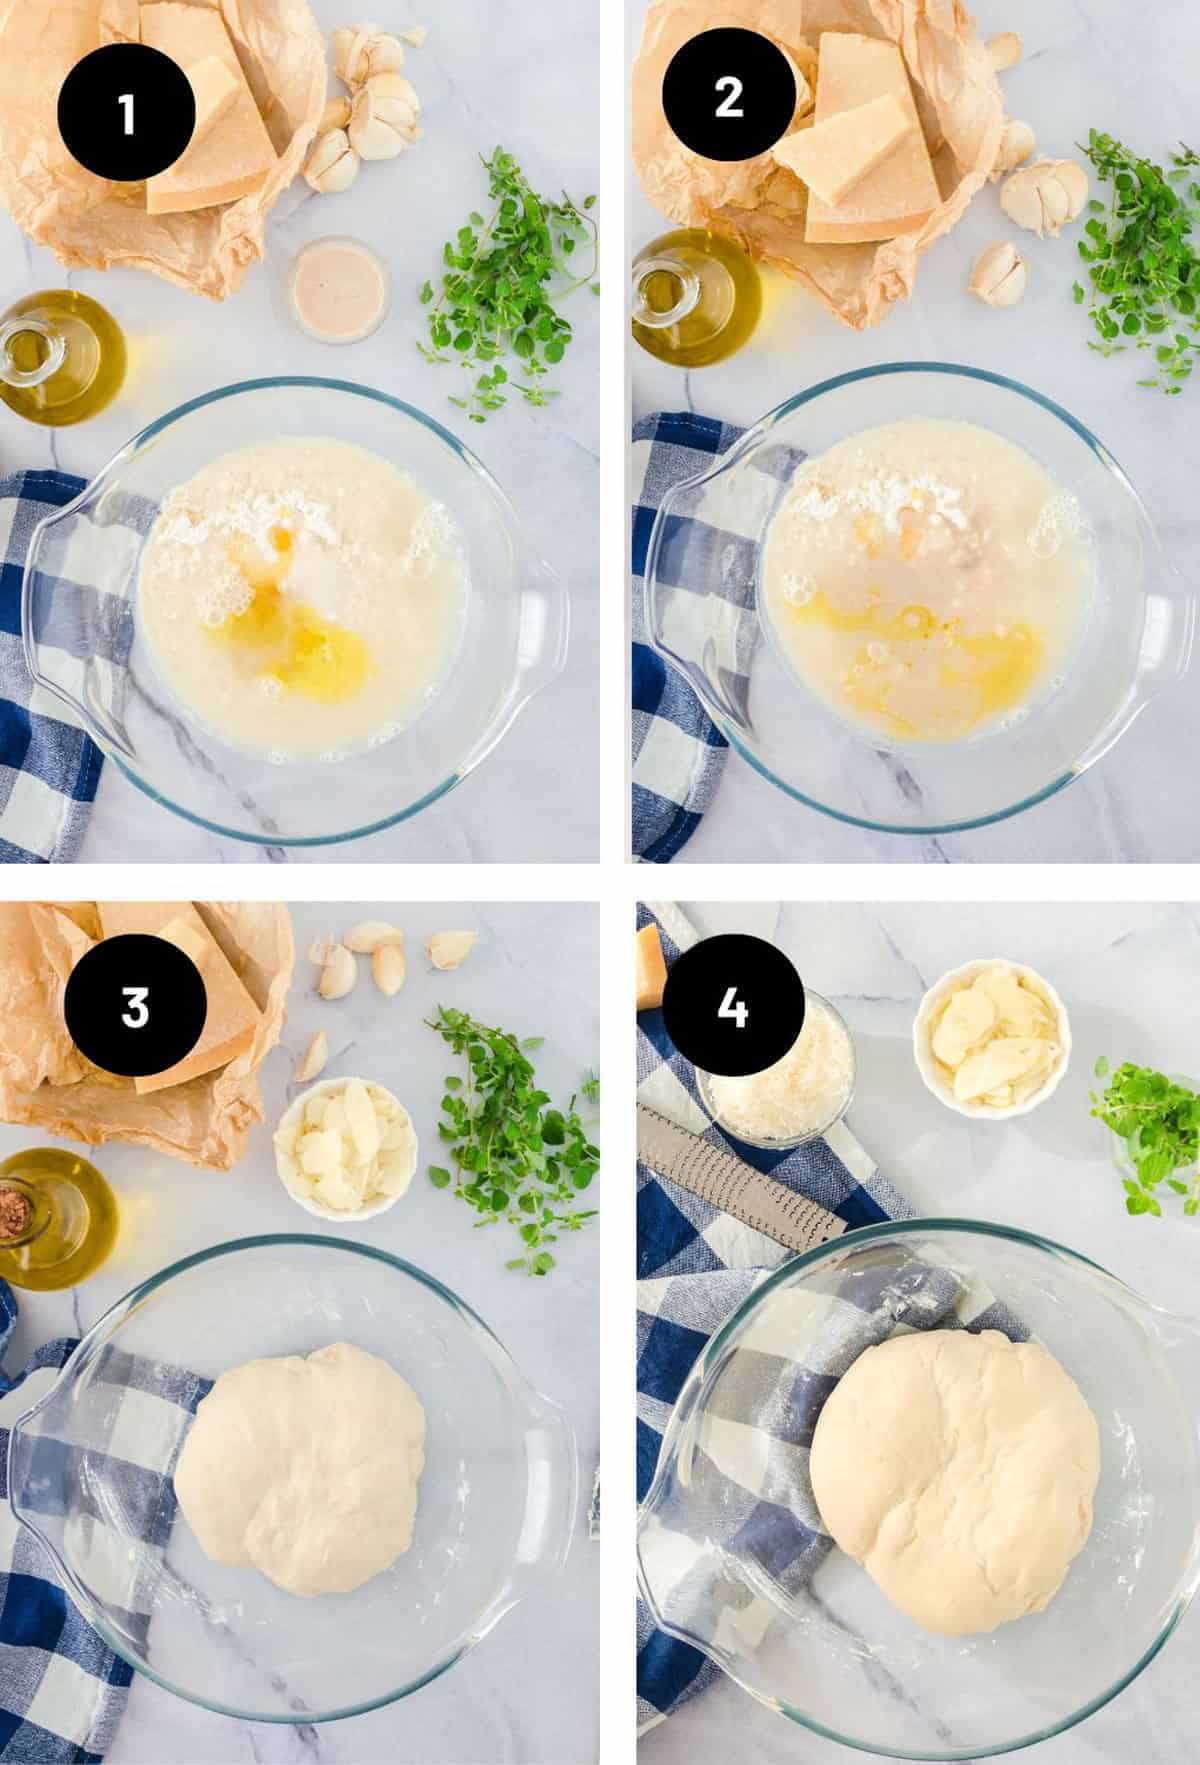
- In a large bowl, add the flour, salt, wine, olive oil, and honey. Use a small bowl or cup to mix the yeast with 1/2 tablespoon of warm water and stir it thoroughly. You can add a pinch of sugar which will feed and proof the yeast.
- Add the dissolved yeast mixture to the bowl and stir well.
- Next, use your hands to knead the dough for 10 to 15 minutes. You can also use the dough hook on your stand mixer to do this. Find a warm place and allow the dough ball to rise for 30 to 60 minutes. Sometimes I slather a little olive oil on top of the dough to keep it from drying out. I like to cover it with a kitchen towel or some plastic wrap while it rises.
- After the initial rise, you can punch it down, knead it for a few minutes, and then let it rise again for another 30 minutes or so.
Pro Kitchen Tip
Pizza dough should be elastic and stretchy. You want it to be pliable and have a little “spring” to it. Adjust the amounts of flour and liquid to get the right consistency. This is part of the fun of making homemade pizza!
How to Cook Pizza in an Oven
While the dough is rising, you can get things ready for rolling it out and baking it. You have a couple of choices for how to bake a pizza in an oven. You can use a metal pizza pan or baking sheet, or a pizza stone (which is how I like to make this garlic pizza.)
Baking this on a Pizza Stone
I recommend that you learn how to use a pizza stone, it’s super easy, and is the best way to give your homemade dough a golden crust on the bottom. To do this, you’ll want to place the stone in the preheated oven for 30 minutes before you place the pizza on it.
If using a pizza stone, do it at 500° F. or higher if your oven gets hotter. Once the pizza comes out of the oven you want to let it rest for at least 5 minutes before you cut it into equal pieces. I like to serve this garlic pizza directly off the stone which will help keep it nice and warm!
I like to brush olive oil on the stone before it goes into the oven. This helps bake the bottom of the crust and also makes it less likely to stick.
Save This Recipe for Later (You’ll Want It Again)
⭐ Most readers end up making this in a few days.
When using a pizza stone, it is important to handle it with care to avoid cracking or breaking it and to allow it to cool down completely before cleaning it.
Make it on a baking sheet.
To make this garlic pizza using a baking sheet, preheat the oven, assemble the pizza on the sheet, and bake it as directed in the full recipe below.
When using a baking sheet, I recommend you line it with parchment paper or sprinkle some cornmeal to prevent sticking.
I also lower the temperature to 425° F. when making pizza with a metal baking sheet. This helps to prevent it from burning. Either way, keep a sharp eye on the pizza as it bakes!
After your dough has risen, it’s time to roll it out and get it in the oven. Here is how we finish making this garlic pizza.
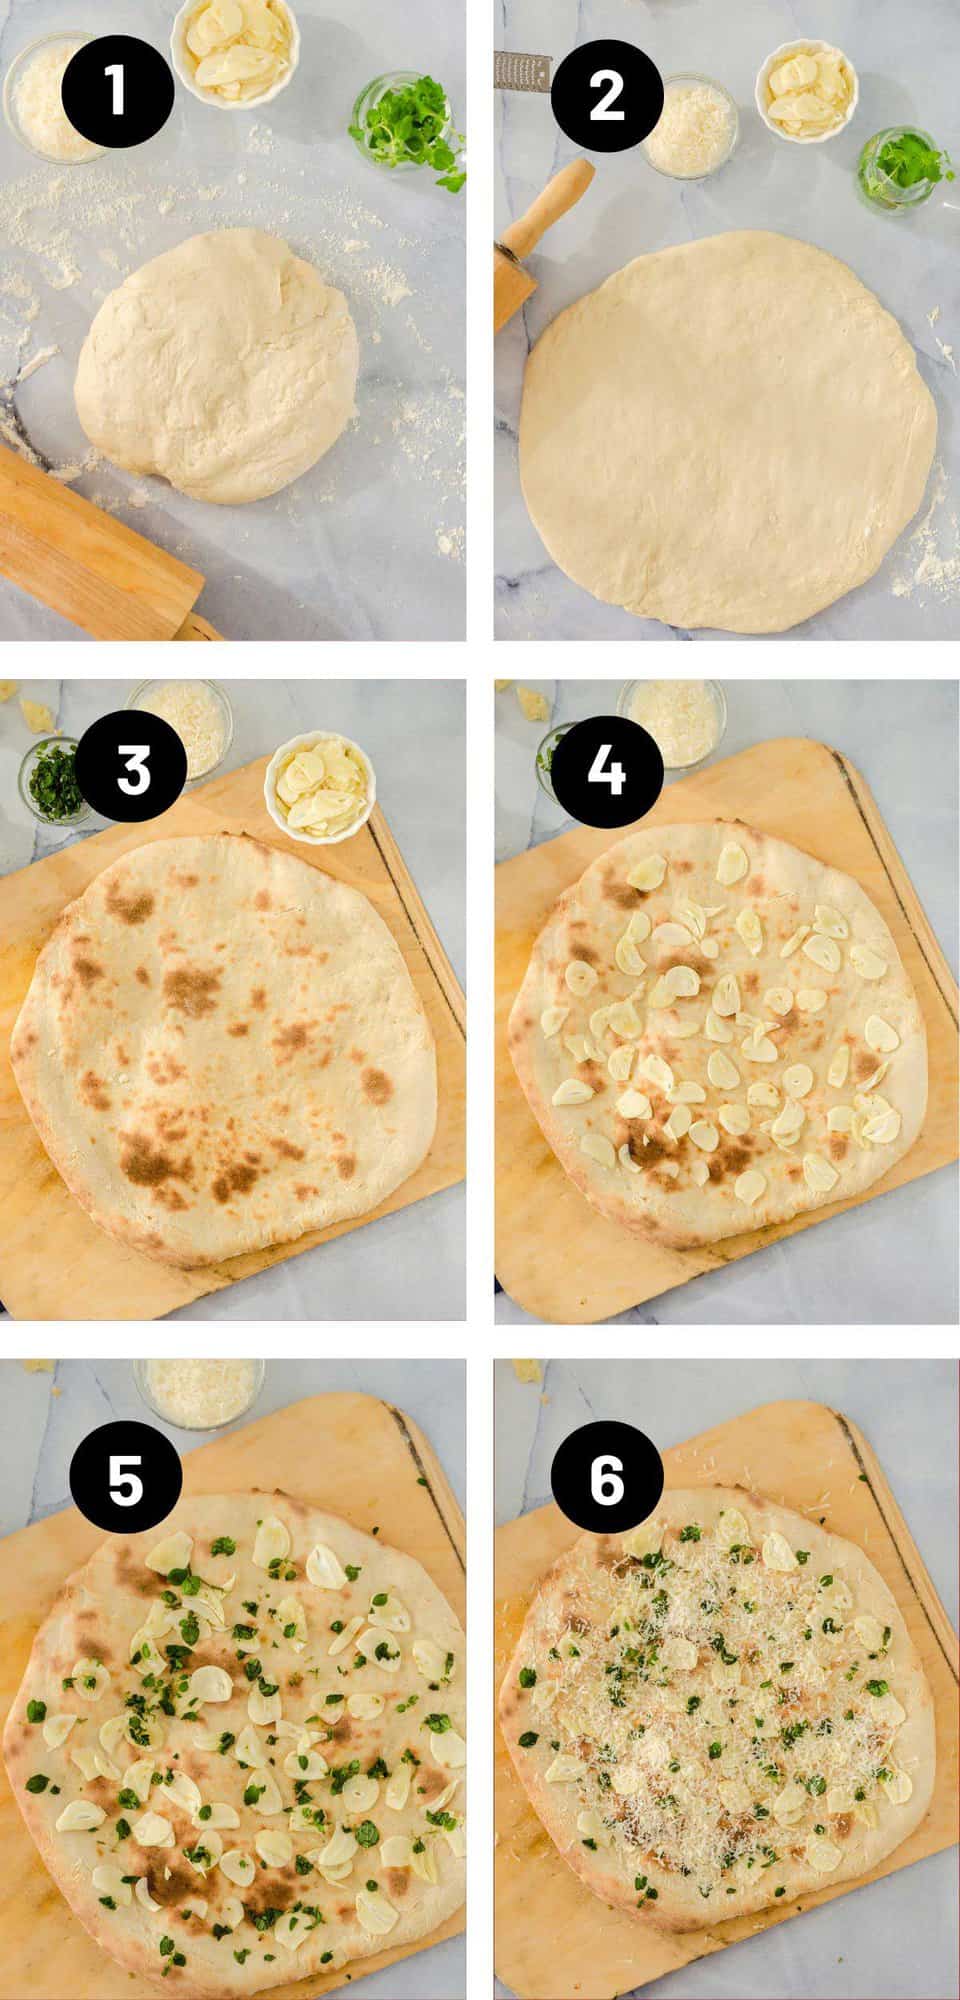
- Place dough on a lightly floured work surface. If you have a pizza peel, you can do it on that and then just slide the whole pizza onto a stone or baking sheet.
- Roll it out with a rolling pin. A small baker’s roll is my favorite tool for rolling out pizza dough. It allows you to fine-tune the edges, and I just find it easier to work with than a big rolling pin. I like to brush some extra olive oil on top of the crust and add a pinch of kosher salt and maybe some garlic powder. All of these things help make this garlic pizza even better!
- Bake the pizza crust for 12 to 18 minutes, until it is lightly browned.
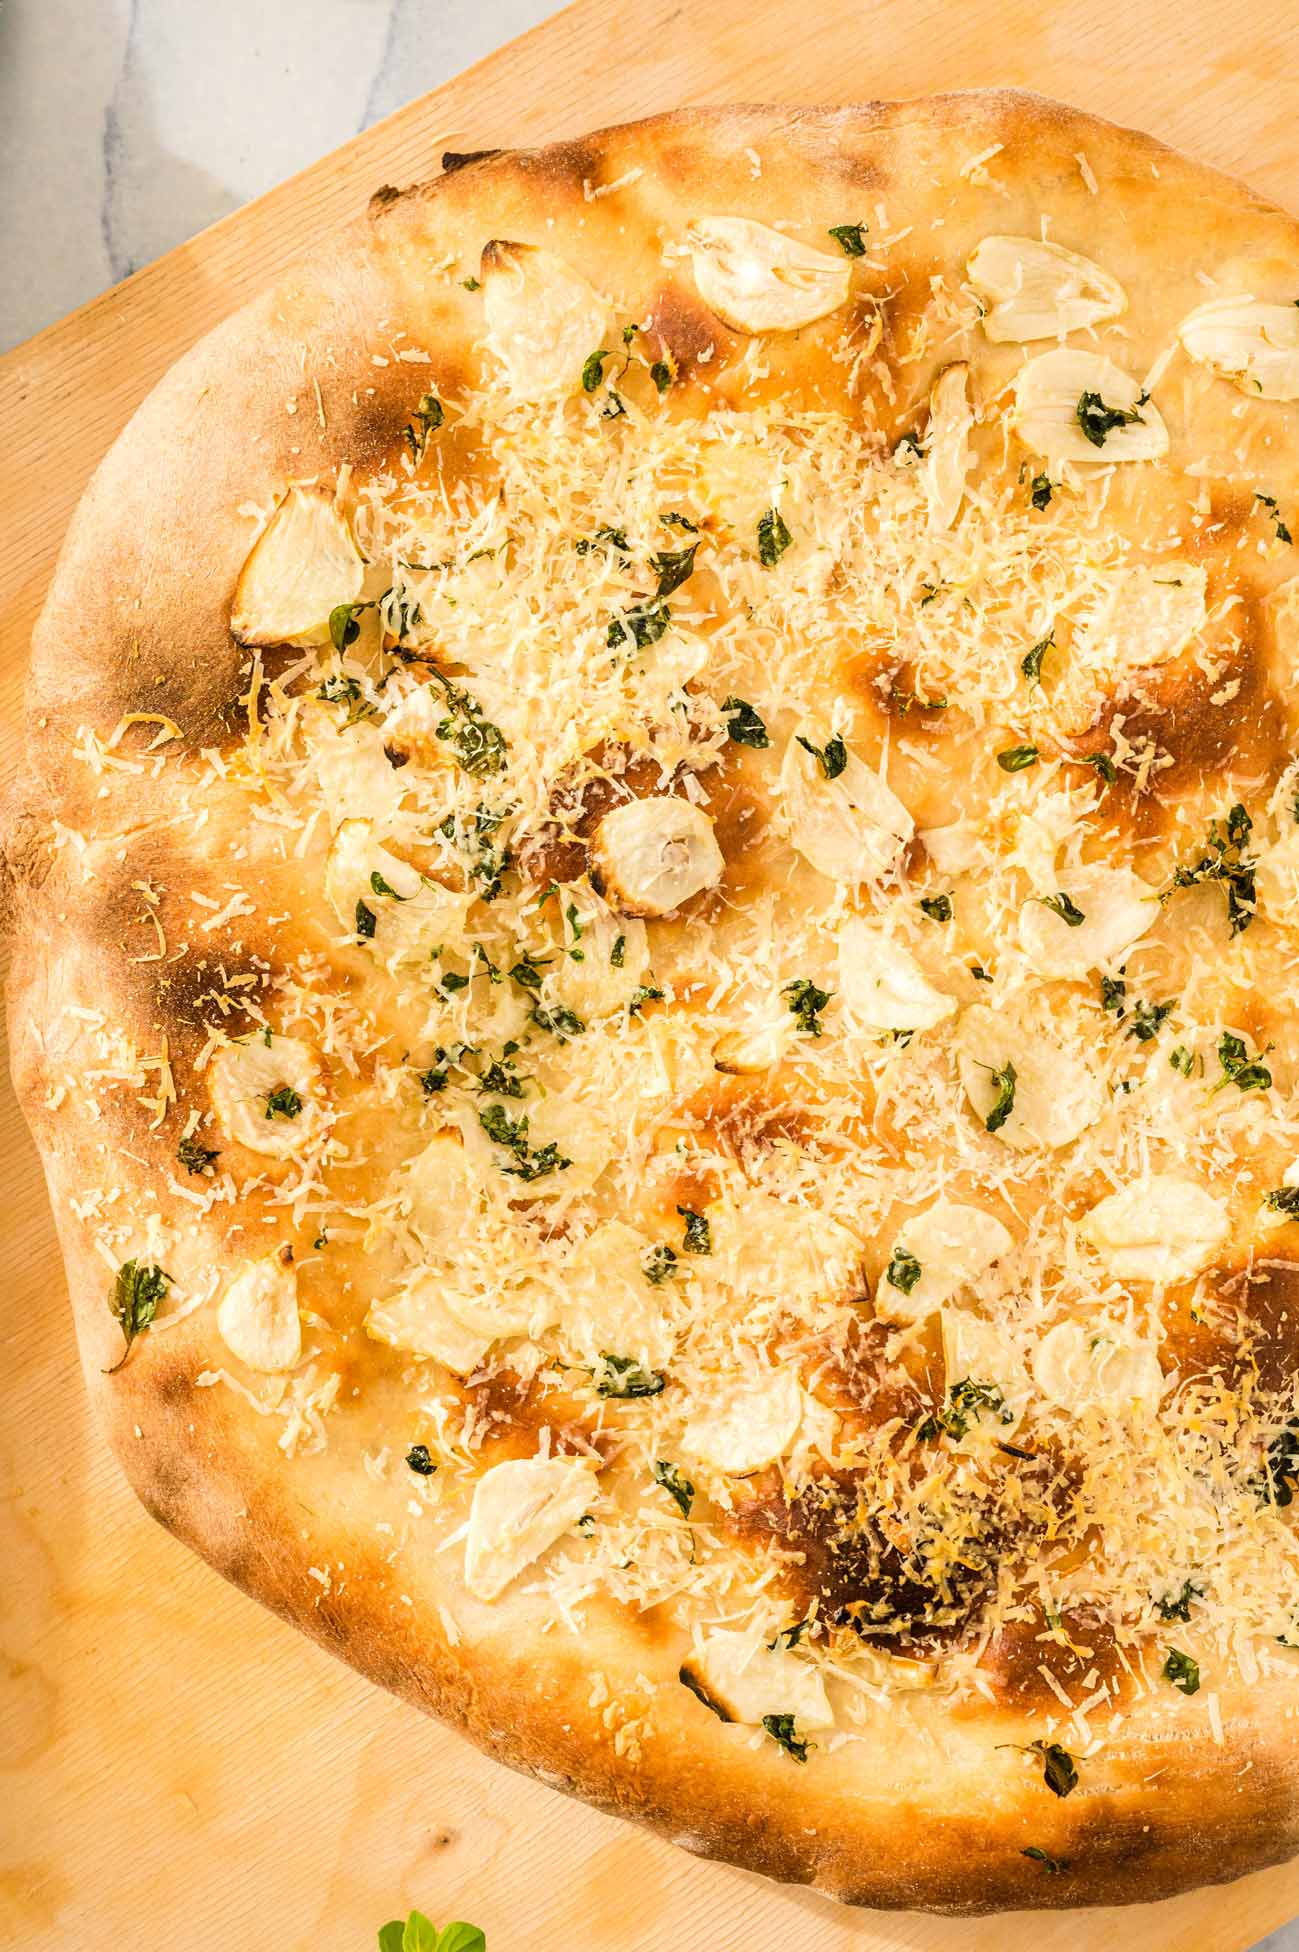
- Evenly distribute the garlic.
- Add the fresh oregano to the pizza, and add a pinch or so of garlic salt to the top. Then, pop it back into the hot oven for five minutes.
- As soon as you take it out of the oven, evenly sprinkle the Parmesan cheese on it.
Expert Cooking Tip
Adding the fresh garlic and oregano at the end will add more flavor to this garlic pizza. These fresh herbs are delicate! Prolonged and intense heat will destroy a lot of their flavors. The same holds true with the cheese, which is why you add it as this comes out of the oven. You’ll get a ton more flavor by doing it this way!
As tempting as it may be to dig into this fresh garlic pizza, you should let it rest for at least five minutes before cutting it. This will give it a better taste and texture, and you won’t burn your mouth from a bite of hot pizza!
↔️ Substitutions and variatrions
- Instead of all-purpose flour, try using semolina flour. This will add texture, flavor, and color to your homemade pizza dough and turn a good pizza into a great pizza!
- Use red pepper flakes or chili flakes to add some heat to the pizza.
- Add fresh vegetables like sliced tomatoes, bell peppers, or mushrooms as toppings.
- Play around with the seasoning. Garlic powder, fresh herbs, black pepper, and Italian seasoning can all make a great addition to this homemade garlic pizza recipe.
- Experiment with different types of cheese, such as mozzarella cheese, feta, or goat cheese.
- Use a traditional pizza sauce by using some tomato sauce or other red sauce. Or, keep it a white pizza by making a white sauce with some heavy cream. Alfredo sauce with some grated garlic or roasted garlic cloves can make for a heavenly topping to this garlic pizza recipe!
- If you don’t have enough time to make your own dough, pick up a store-bought pizza crust the next time your at the grocery store. This can make an excellent pizza base. Jazz it up with some garlic butter sauce or garlic oil.
🤔 Common recipe questions
Yes! The main ingredient of this garlic pizza is good for you! I guess you could call this a healthy pizza! Read about the health benefits of garlic here.
The best way to store leftover pizza is to wrap it tightly in plastic wrap or aluminum foil and place it in an airtight container. Of, you can keep the leftovers in a resealable plastic bag or airtight container.
😋 How to reheat leftover pizza
I have been known to eat this garlic pizza and other types for every meal of the day. And as a midnight snack. For food safety reasons, it’s important to keep the leftover pizza in the refrigerator and eat it within 3-4 days.
Honestly, it usually doesn’t make it past 12 hours in our house. After that, it’s gone. Not even a crumb leftover!
When reheating leftover pizza, you can use a preheated oven, a toaster oven, a skillet, or a microwave.
Reheating in the oven or toaster oven at 350°F (176°C) for 5-10 minutes will usually give you the best taste and texture.
Another good way to reheat pizza is to microwave it for a minute, then pop it in the air fryer for about 3 minutes. You’ll get a warm crispy slice of leftover pizza!
❤️ Pizza love
While I was putting this together in our little lake cottage, I suddenly noticed one of our six foodie boys standing at my side. This time it happened to be Isaiah, the one who was born with a golden palate. (He’s the one that will request seafood for breakfast.)
As I explained to him the characteristics of a good dough – pliability, how it should spring back when gently pulled, and taste – he looked on with interest and then asked if I had ever caught a firefly.
Boy, that one made me stop and think. I felt sure I had, but as I told my 9-year-old, probably not since I was his age.
Soon our dough was rising, and before I knew it, Ike had me washing out an old pickle jar, and he and I were out the door, in hot pursuit of little flashes by the lake.
It was only minutes before his quest was successful, and once we were back inside, with a sharpie in hand, my son was labeling the pickle jar lid with the name of his new prize, “Flash.”
This pizza recipe, like most I make, was a new creation. Like most of them, this one turned out pretty darn good; the kind that makes me want to make another today. On a side note, Flash slept soundly next to Isaiah and according to my entomologist-in training, flashed throughout the night.
This post is really about making your own pizza crust from scratch. As with this garlic pizza, the choices for toppings are as limitless as your imagination.
Please give garlic pizza recipe a try. It’s fun to make with kids, family, and friends. Perhaps just as important, most of us can honestly say, “Who doesn’t love pizza?!”
If you’re looking for a fast and easy flatbread pizza recipe, My Aldi Kitchen has just the ticket! Looking for a good low-carb pizza? Be sure and take a look at our easy Keto Pizza Dough Recipe. And for the King/Queen of pizza creations, gawk and drool over our Pizza Rustica!
More delicious homemade pizza recipes
👨🍳 Tried this Recipe? Please leave a ⭐⭐⭐⭐⭐ rating in the recipe card below and leave a comment. We love hearing from our readers!
⏩ Stay in touch with us on social media by following us on Facebook, Pinterest, Instagram, and YouTube!
📬Get our Recipes delivered to your inbox for FREE!

📋 Garlic Pizza Homemade Pizza Dough
Save This Recipe for Later (You’ll Want It Again)
⭐ Most readers end up making this in a few days.
Ingredients
For the Crust
For the Topping
- 1/2 cup fresh oregano leaves, coarsely chopped.
- 5 garlic cloves, thinly sliced
- 1/4 cup grated Parmesan cheese
Instructions
For the Crust
- In a large metal or glass mixing bowl add flour, salt, wine, olive oil, and honey. In a small cup, add yeast and 1/2 tablespoons warm water, just enough to dissolve yeast upon stirring and add to flour mixture. Stir thoroughly. After ingredients are well mixed, knead with hands for 10 to 15 minutes. Add additional wine or water, a little at a time if necessary so that dough is slightly moist and easily pliable. You want your dough to spring back when gently pulled. After adequately kneaded, place back in a large bowl, cover with a kitchen towel, and place in a warm spot. Allow t the dough o rise for at least an hour. If you want, you can let it sit for a half hour, punch it down and knead again for a couple of minutes and then allow it continue to rise.
- While dough is rising, prepare your pizza baking surface with a light, even coat of olive oil. My preferred method of baking a pizza is with a stone. If you have a stone, preheat your oven to it’s highest sitting, preferably at least 500 degrees F. If you are using a metal baking sheet, preheat oven to 425 degrees F.
- Bake your pizza between 12 and 18 minutes, depending on the oven temperature and basking surface you are using. Don’t be afraid to check your pizza at 10 to 12 minutes, take a peak at the undercrust. When it’s medium-dark brown in color, it’s probably ready
For the Topping
- Place oregano and garlic on crust 5 minutes before taking it out of the oven. Evenly distribute cheese over other ingredients either at this time or immediately upon removing from oven upon completion of baking.
Notes
Nutrition
Nutrition information is automatically calculated, so should only be used as an approximation.
Updated from the original post of June 24, 2013.


What a delicious and simple dish! Nothing beats the oregano and garlic combo. Can’t wait to try this!
Oh gosh, transport me back to summer – sounds like an ideal place and time. Love the sound of your pizza and thanks for the helpful guidance on making it successful.
Perfect comfort food for me – love the simple flavours of oregano and garlic, so good.
I am always trying different pizza dough recipes so I am surely bookmarking and trying yours. Thanks!
This looks so delicious! I can almost taste the garlic!
Ooh! This looks so good! I love oregano anything! Plus it’s good for you. So I know this would be quite tasty!
Oh my. I would have been in heaven
Wow, this looks absolutely delicious. I’m pinning! I have yet to find a homemade recipe I really like but I can almost taste this just looking at the photos, can’t wait to give it a try.