Easy Homemade Crusty Bread
Published Mar 05, 2025
This post may contain affiliate links. Please read our disclosure policy.
This crusty bread recipe is simple and fast to make, anyone can make this homemade bread at home in three fast hours. It’s easy to see why this is our most popular of our many bread recipes.
Bread making was my kitchen weakness until this simple no-knead recipe came along. Read on, and I will show you step-by-step exactly how to do it with this easy method that uses just four ingredients.
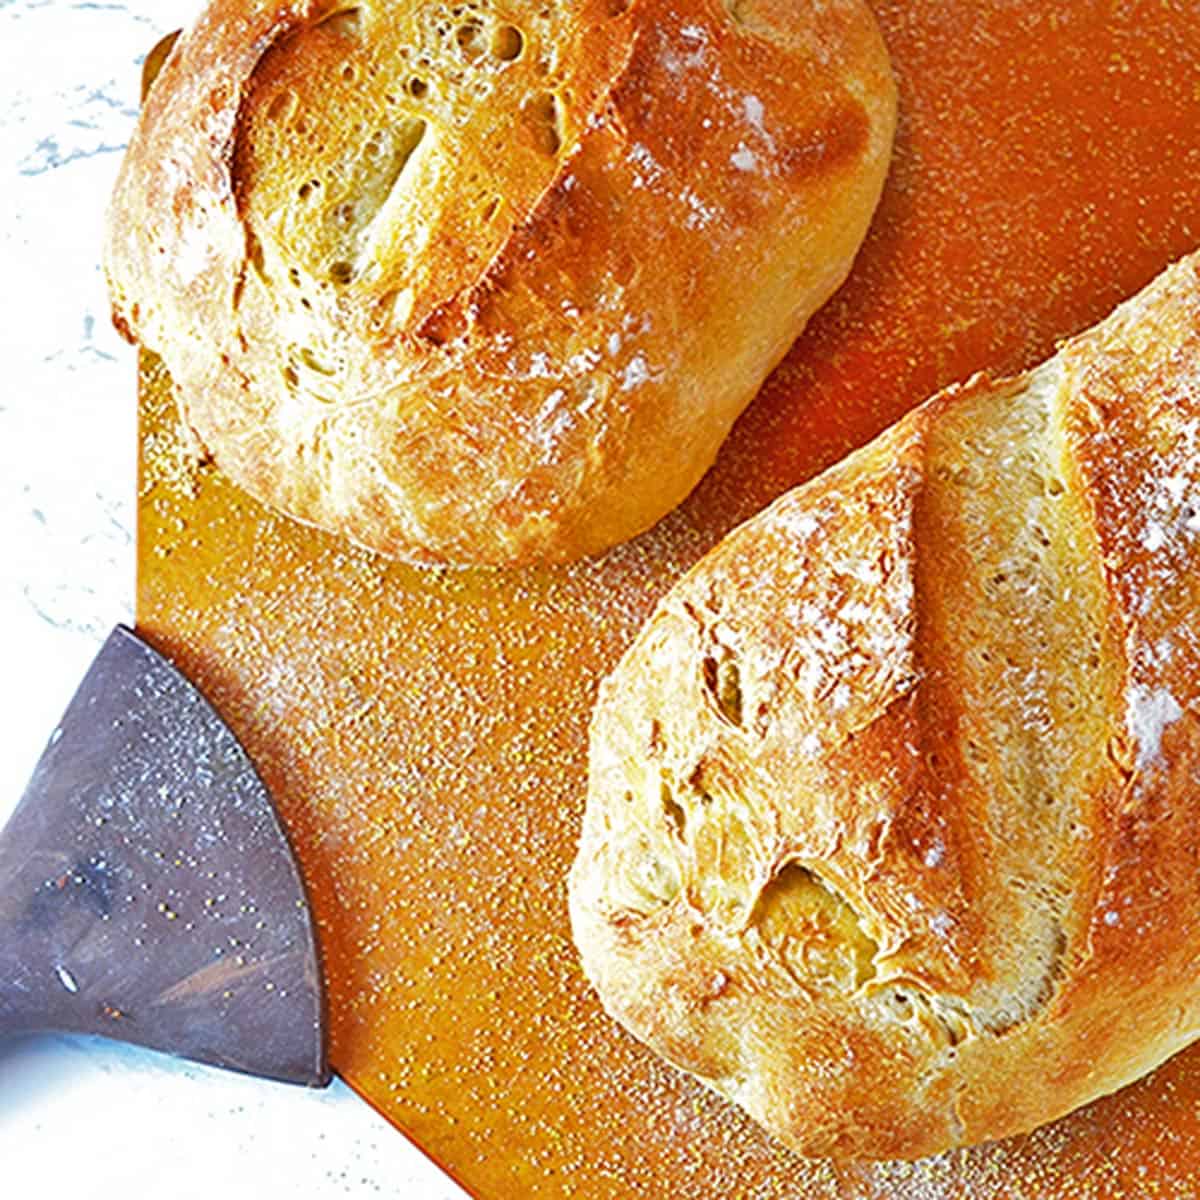
Table of Contents
Making homemade bread can be intimidating. Please do yourself a favor and review the comments that follow this post.
Many readers have asked questions and offered feedback with this crusty bread recipe. From love letters to near-hate mail, this recipe for homemade bread gets all kinds of comments!
🍞About This No-Knead Bread Recipe
I grew up in a big Mennonite farm family. My mom made many different bread recipes like this lemon blueberry bread, all sorts of cakes from scratch, homemade Amish pies, and other baked goods every day as a small part of her daily routine. I took too many of those skills for granted.
Then, I grew up and tried to grow a huge garden, like my mom. Not so easy. I tried to iron my clothes like my mom. Not so easy
And I tried to make homemade bread, like my mom. Again and again and again and always not so easy. Until this recipe came along, I’m not kidding.
It’s perfect for so many main courses. Delicious recipes like classic veal marsala, Polish stuffed cabbage soup, or a more traditional golumplki recipe, and our slow cooker creamy garlic and mushroom meatballs. Or, For an easy appetizer, slice and toast this loaf and top with cream cheese, capers, and our smoked salmon recipe for the perfect crostini.
What’s in it?
Part of the ease of making this crusty bread recipe is the short list of ingredients. Aside from water, there are only three others:
- Flour
- Salt
- Yeast
It doesn’t get much simpler than that. No buttermilk, no scalded milk, no unusual ingredients. And, no kneading!
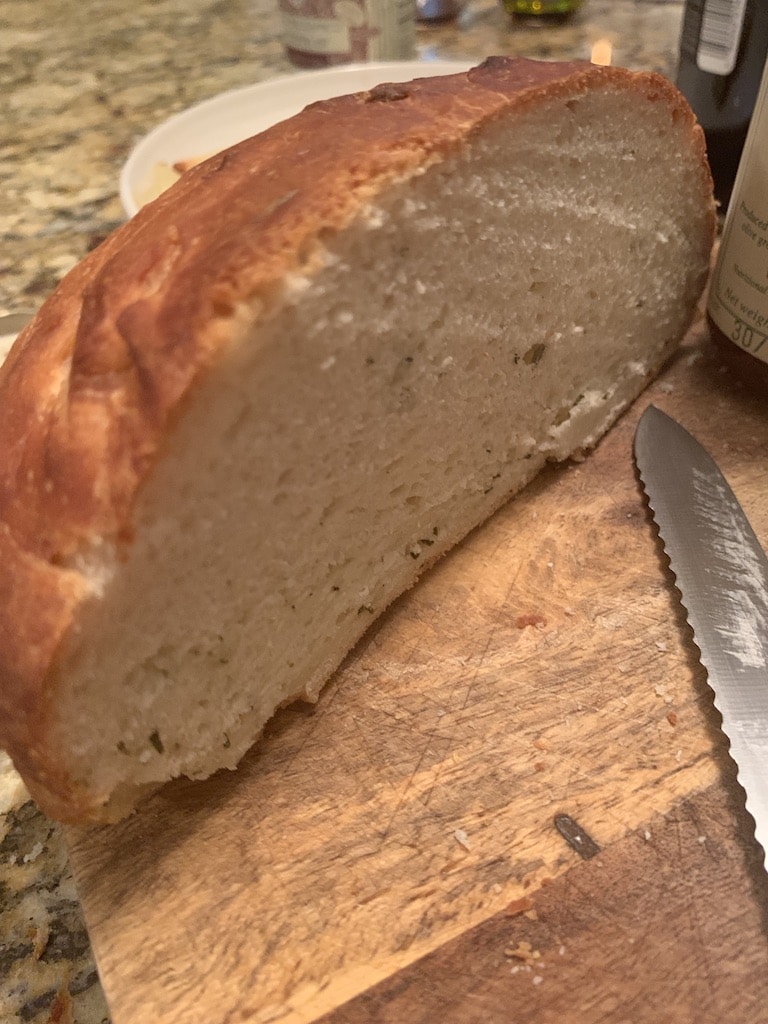
To get a nice crust on this homemade bread, we use a steam bath. It is an age-old method of creating a crunchy and crusty outside. Placing hot water in a hot pan creates a steam bath that encases the dough and ensures you get a crisp finish. Scroll down for our step-by-step directions on how to do this.
Pro Breadmaking Tip: Another secret to ensuring a crisp crust on the bottom: place each loaf on a hot stone when it goes in the oven.
There are two easy ways of doing this, once it is ready to bake.
- You can dust a pizza peel with corn meal.
Once it’s ready to bake, simply place the pizza peel on the hot baking stone and the unbaked loaves will slide off with ease.
- You can also use parchment paper to transfer each unbaked loaf to a hot baking stone. Allow the loaf to rest on a sheet of parchment paper (in the final raising stage.)
When the dough is ready for the oven, transfer the parchment paper to the hot stone. This will help you achieve the same crispy crust on the bottom.
Either of these methods work for creating a crisp bottom to a pizza crust recipe as well.
🔪 How to Make Crusty Bread
(See the full crusty bread recipe below at the end of this post)
I’ve broken down the process to make this crusty bread into a bunch of steps for you. It looks like there are a lot of steps, but I promise, every one of them is super simple.
Adding ingredients, stirring, baking, and things like that. As I found out, making delicious homemade bread is not rocket science. In fact, it is not like black-and-white science at all; this is where the art of baking comes into play.
For example, there are variations in oven temperatures. Also, differences in humidity can make a difference. This can determine the amounts of liquid (water) vs. solid (flour) to get the right consistency.
Find what works for you by a little trial and error. Once you get it right, this is the only recipe for crusty bread you will ever need.
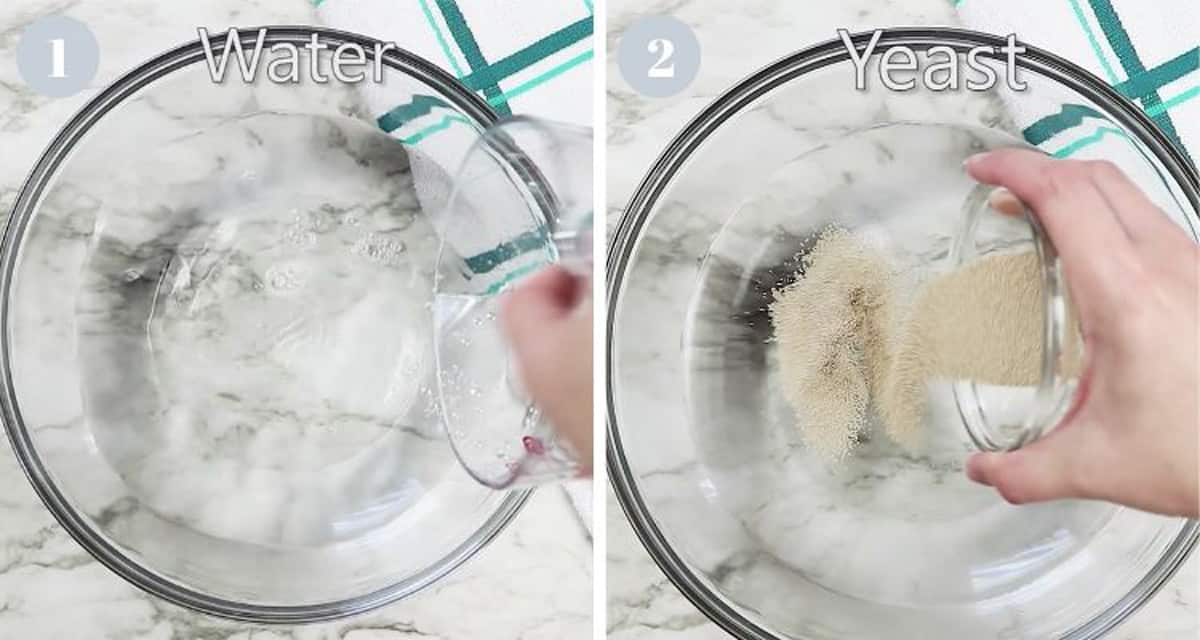
1. Start with lukewarm water (100° F).
Pro Breadmaking Tip: Be sure your water is not too hot, or it will kill the yeast. By the same token, it has to be warm enough for the yeast to rise. For best results, I like to use this instant-read thermometer. Is the best one out there, and it is the one I always recommend using.
2. Add active 1.5 tablespoons dry yeast.
- If you’re not sure if your yeast is good, proof it first.
How to Proof Yeast

Proof your yeast by adding about 1/4 cup of warm water with a pinch of dissolved sugar. The sugar will give the yeast energy to produce carbon dioxide, which will “prove” the yeast is good.
Allow it to sit for 5-10 minutes, if the yeast bubbles and foams as shown, your yeast is alive and well and ready to help make bread.
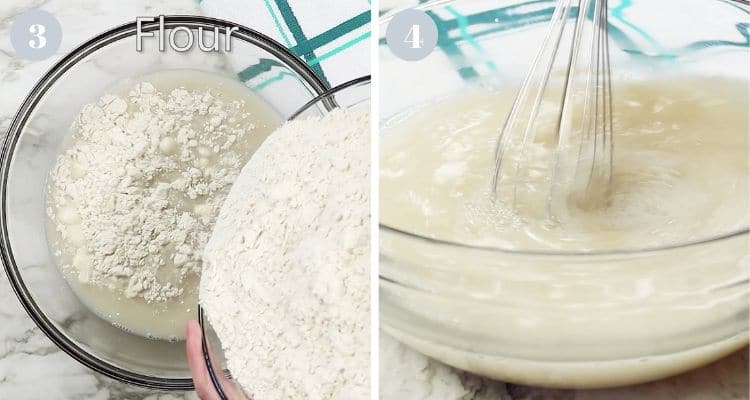
3. Add flour.
- All-purpose flour works fine for making homemade bread, but bread flour will give you a chewier crumb because of its high protein content.
4. Use a wire whisk to stir the water, yeast, and flour mixture.
- As the mixture gets thicker use a heavy wooden spoon to mix it, or a stand mixer with a dough hook, on a low setting.
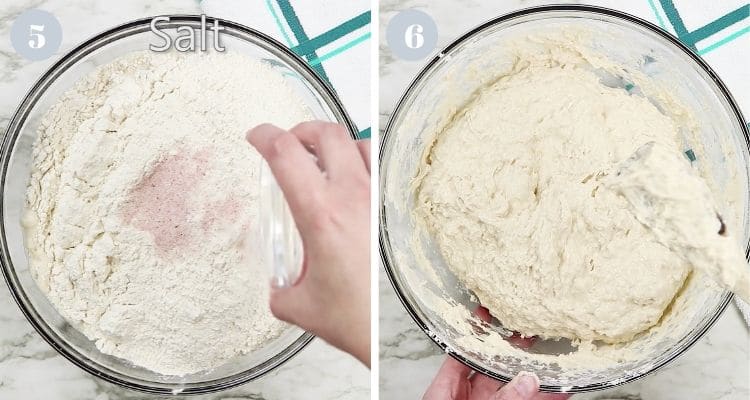
5. Add salt to the other ingredients.
- Salt does a whole lot more than just add flavor! King Arthur Flour does a great job of breaking down the details of salt’s important role in successful breadmaking.
6. Stir the dough again, cover it with a kitchen towel and allow it to rise for two hours.
7. Set in a warm place.
If possible, allow the homemade bread dough to rise away from chilly air or where there is a cold draft.
- Sunny windowsills are great places for this to rise.
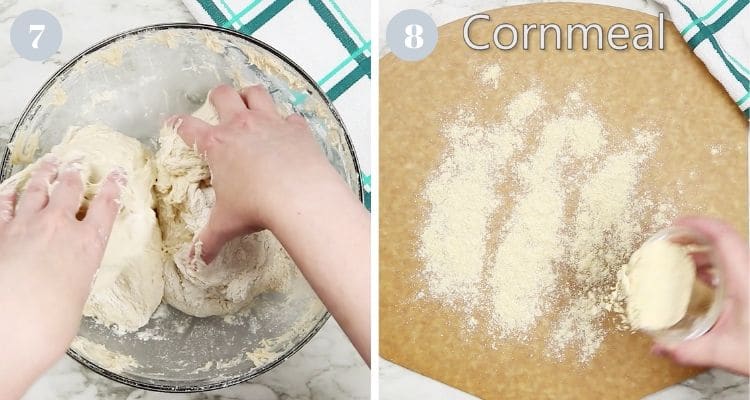
- After the dough has risen, apply a light dusting of flour over it and divide it into two loaves.
8. Lightly dust a pizza peel with some cornmeal.
The dough will be wet!
This is normal.
If you need to, add a little more flour to work with it and shape it, that’s ok!
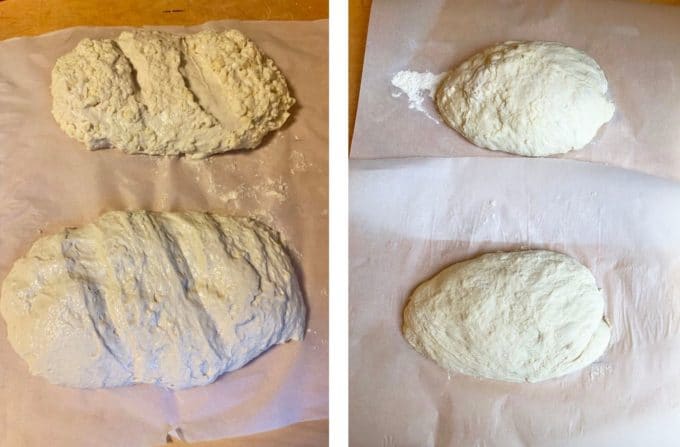
The dough on the left is too wet. The example on the right has had a little flour added to it and reshaped. If the dough seems too dry, then add just a splash of water and work that into the dough.
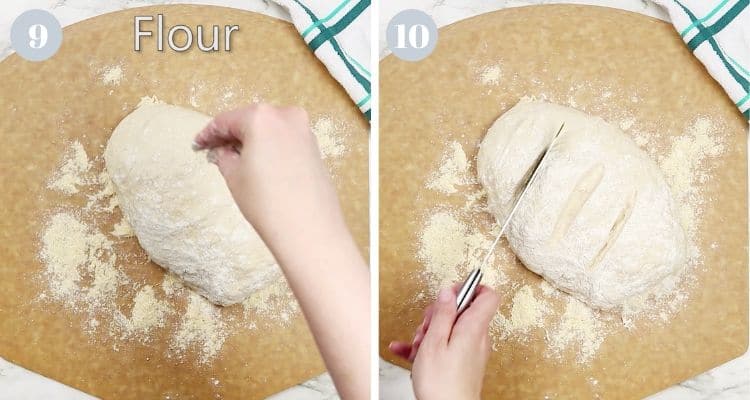
9. Continue to shape the loaves
Use the pizza peel for this and apply a light dusting of flour.
10. Score the top of each loaf before baking.
This will help guide the direction of expansion for each loaf as it bakes.
Cover the loaves with a kitchen towel and let them rise again, for 40 minutes.
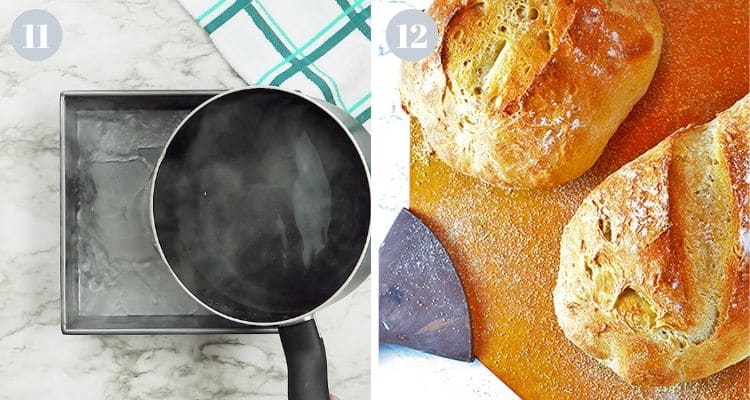
11. Prepare a steam bath
Use some hot water from the stovetop. Place it on the oven rack under where the bread will go immediately after it goes in the oven.
- Place a dry cast-iron skillet on the lower rack of the oven.
- Place the unbaked loaves on the rack above the skillet.
- Pour hot water into the skillet and close the oven door immediately.
- Do not open the door of the oven until you remove the bread.
12. This crusty bread is ready to eat in about 3 hours
From start to finish. Only about 10 minutes of that time is making the recipe. The majority of the time involves rising and baking.
Save This Recipe for Later (You’ll Want It Again)
⭐ Most readers end up making this in a few days.
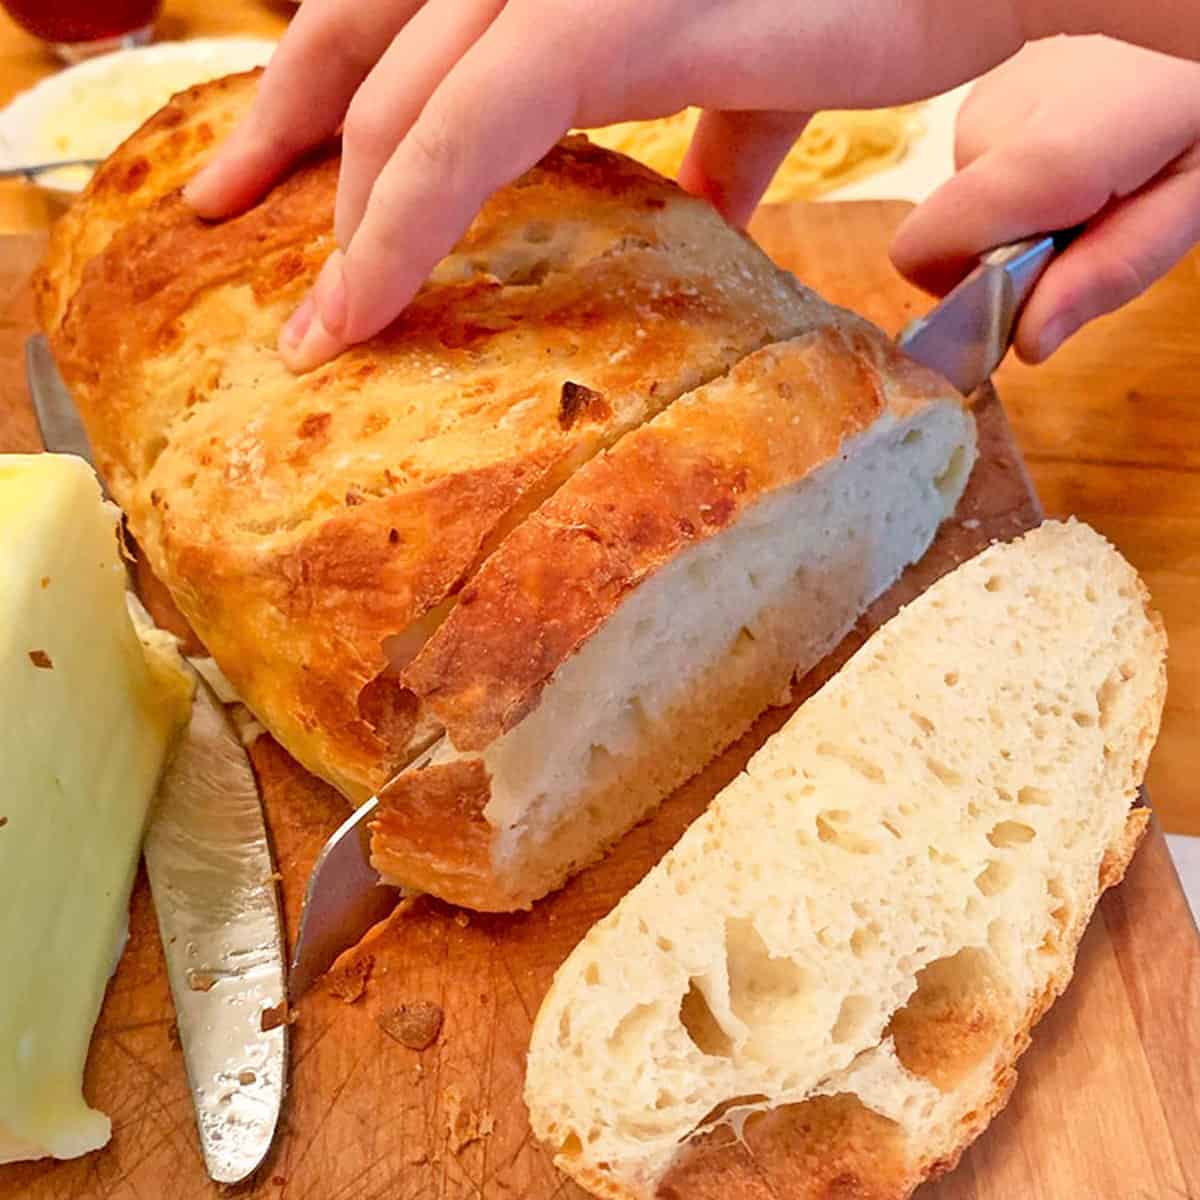
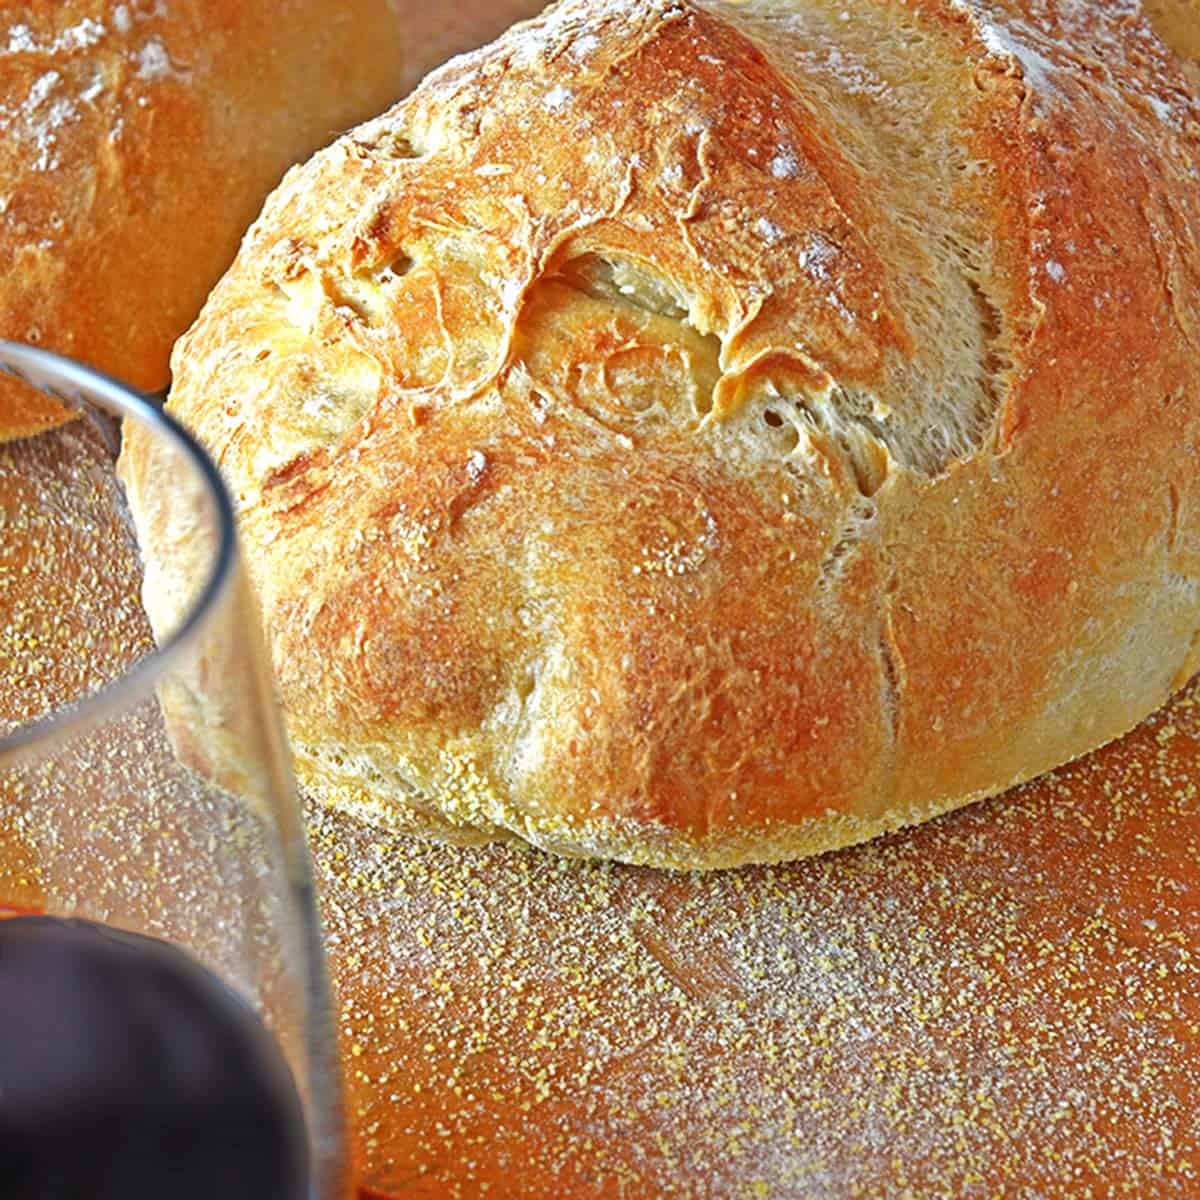
Baking on a hot pizza stone will give you a beautifully crispy bottom to each loaf.
Important Note: This dough for this crusty bread recipe is very wet, and you may find it difficult to work with and shape. It’s supposed to be this way.

You can make this crusty bread in a skillet or Dutch oven[/caption]
As a bonus, the dough keeps in the refrigerator, up to a week or two so you can bake it when you like. That way, you can make this recipe when entertaining. Your guests will think you worked for hours preparing it!
One more thing, if you’ve never had toast from homemade bread, you don’t know what you’re missing. I kid you not.
This crusty bread recipe is a game-changer, and I’m living proof. It’s not my mom’s recipe, but it’s not bad.
💭 Baking Tips

Baking is not an exact science. Sometimes it takes a little playing in the kitchen to get any baked recipe “right.” I’ve been baking my whole life, since the age of 7. In my experience, nothing from the oven is more true to this concept than homemade bread (and rolls).
I’ve gotten some harsh criticism for this recipe in the comments below. A few people call it a “waste of dough,” “a waste of time”, and a bad recipe.
Folks, making homemade bread is not the same as going to the local bakery and picking up a loaf from the shelf! Until you make it a few times. Once you nail the method, I promise, you will feel like you reached a major kitchen win!
It takes a little practice. Other than some time, the cost of these ingredients is very small. You need to find out what works best for you and then make this recipe for crusty bread your own.
If the Dough is Too Wet (or Too Dry)
- Add a little more flour to it, so it will maintain its shape.
- While it is rising, don’t be afraid to check in on it.
- If it needs to be “patted inwards” (from the sides), gently use the palms of your hands to shape it.
- Add a small amount of water to the dough if it seems too dry (flaky and dry.) It should be pliable and wet to the touch.
If making multiple loaves
Bake one loaf one at a time. If you need to adjust your oven temperature or baking times, you can try that with the second loaf. To illustrate what I’m talking about, take a look at these two loaves (from the same batch of dough.)
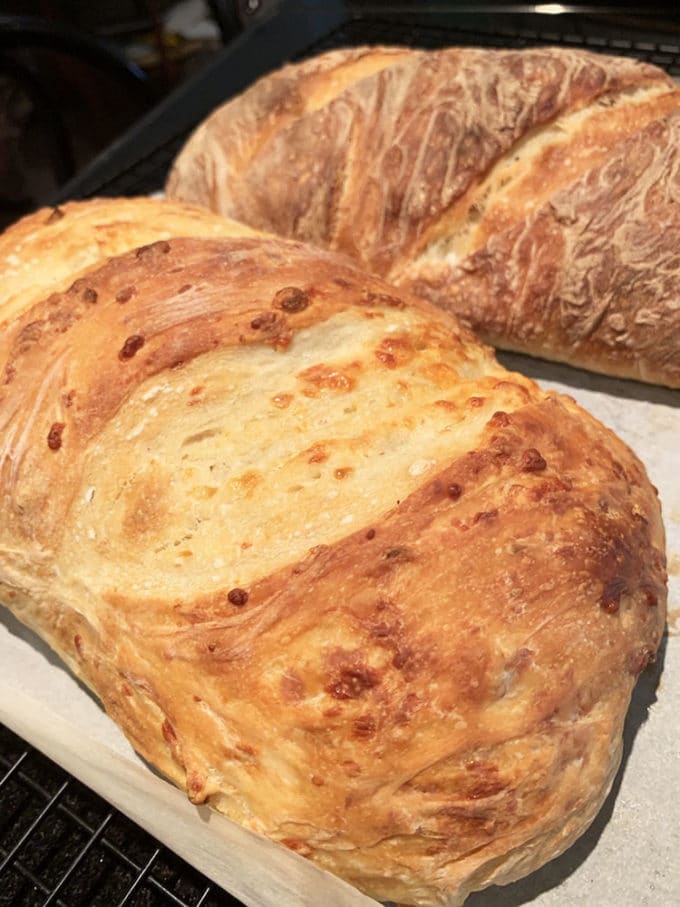
The darker loaf (top) was baked first, at 450° for 30 minutes.
I thought the crust was a little dark, and so for the lower loaf (garlic and cheese), I reduced the oven temperature to 400° and cut five minutes off the baking time, to 25 minutes.
Both loaves were mouthwatering and chewy, but the crust on the second loaf is not quite as dark.
Let the Dough Rest Overnight in the Refrigerator
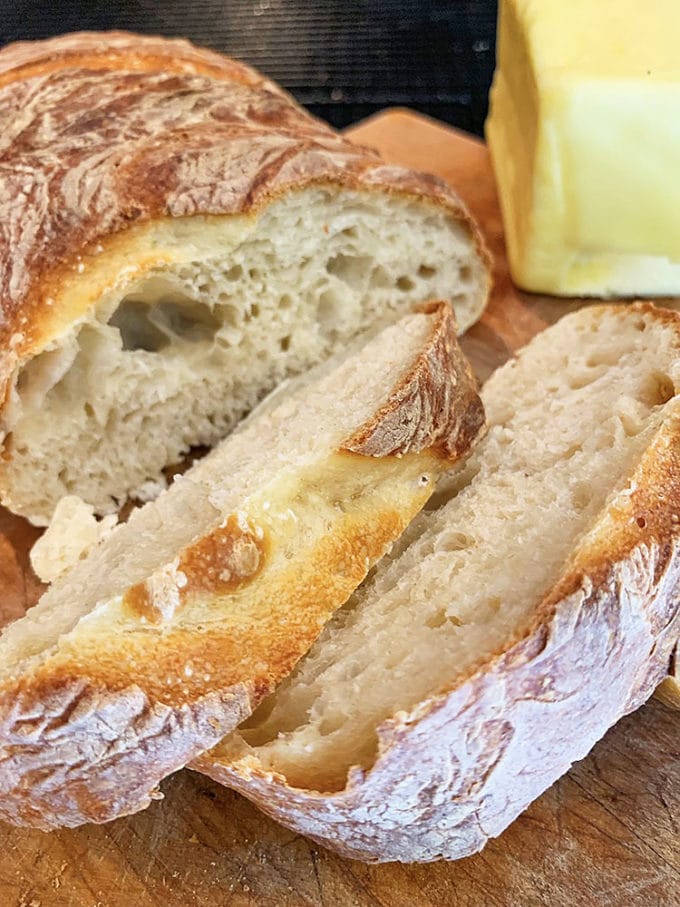
Allowing the dough to spend a night in the refrigerator will enhance its flavor and make it chewier.
- Place it in a metal bowl that will allow for further expansion, because the yeast will continue to do its thing while in the fridge.
- Place plastic wrap on any exposed surface of the dough to keep it from drying out.
- Place a damp kitchen towel over the plastic wrap.
- Remove the dough from the refrigerator 3 to 4 hours before baking, to allow it to come to room temperature and rise again.
Mix the dough by hand
Mixing the dough by hand is easy because it is not a thick, heavy dough.
Instead, it is wet and sticky. Use a heavy-duty whisk if you have one or a heavy wooden spoon.
I tried to save some elbow grease and use my beloved KitchenAid stand mixer, and this is what happened:
As you can see, I got a very dense crumb because it had been over-mixed. This loaf had the same great flavor, but the bread was not as airy and chewy as the batch in the photo above it.
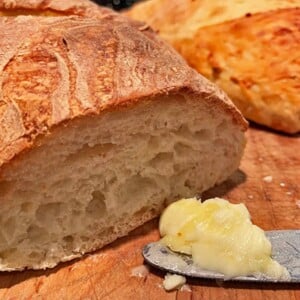
Use Quality Ingredients
If you’re going to go to all the work and mess of making your own bread, do yourself a favor. Don’t skimp on cheap ingredients that are not of good quality. This is especially true of what you spread on it
If it’s butter, use the best you can find, from a known source or fresh and organic. Finally, nothing tastes better with crusty bread than homemade soup.
💬 Common Questions About Making Crusty Bread
To get that addictive crusty exterior, maintain high moisture levels in the beginning of baking, often by using a preheated Dutch oven or introducing steam with a water tray or misting the oven walls.
Dense bread can result from under-proofing (not letting the dough rise long enough), using old yeast, or not kneading the dough sufficiently to develop gluten.
While all-purpose flour can work, bread flour contains more protein, which helps develop the gluten structure and gives your bread a better rise and chewier texture.
To maintain the crustiness of your bread while ensuring the inside stays soft, follow these guidelines:
Avoid Plastic Bags: Storing crispy bread in a plastic bag will cause the crust to soften due to trapped moisture.
Paper Bag or Cloth:Ideally, store crispy bread in a paper bag or wrapped in a cloth. This allows the bread to breathe while still offering some protection from external elements.
Keep it Cut-Side Down: If you’ve sliced into your loaf, store it cut-side down on a cutting board or counter. This helps preserve the crust’s crispness by reducing the exposed crumb’s contact with air.
Avoid Refrigeration: Storing bread in the refrigerator can actually make it stale faster. If you need to keep bread for an extended period, consider freezing it instead.
Freezing for Longer Storage: If you won’t be eating the bread within a couple of days, consider slicing and freezing it. Wrap it tightly in plastic wrap or place it in a zip-top bag, removing as much air as possible. When you’re ready to eat, thaw it at room temperature or pop slices directly into a toaster.
Remember, crispy breads like baguettes are best enjoyed fresh. Over time, even with proper storage, the crust may soften or the inside may become dry. If this happens, you can briefly reheat the bread in a preheated oven (around 375°F or 190°C) for a few minutes to revive its crispy texture.
Helpful Readers’ Comments
- Consider adding the following for more flavor.
- A bit more salt
- Shredded cheese
- Kalamata olive
- Pumpkin seeds
- Sunflower seeds
- Whole wheat flour
- Garlic or rosemary, etc.
- Leave the water (for the steam bath) in the oven for the entire baking time.
- If you don’t have a pizza stone, you can use a:
- Cast-iron skillet
- Dutch oven
- Cookie sheet
- Regular loaf pan
- Casserole dish
- If the dough seems to wet to work with, add a generous “dusting” of flour to it.
How to keep homemade bread fresh-tasting
Here are some tips to help keep homemade bread tasting fresh:
- Always keep bread in a cool, dry place and out of direct sunlight.
- If you won’t be able to eat the bread within a few days, it’s best to freeze it. You can also freeze bread easily. Just use some plastic wrap or aluminum foil. Be sure to get all the air out before sealing. (Even zip-lock bags work for keeping bread fresh this way.)
- To refresh stale bread, try reheating it in the oven. Warm up your oven to 350°F (175°C) and place the bread on the middle rack. Heat for about 10 minutes until the bread is warm and the crust is crispy.
- To keep any bread fresh, you can keep it in the refrigerator. This will slow down the staling process, but the bread may become drier, and the texture may change slightly.
- If you want to get even more use out of your bread, you can make this easy bread pudding or croutons with it. This is a great way to use up stale bread and avoid waste.
👉 Wondering what to make with your fresh bread? Try making air fryer toast—crispy, golden, and ready in just minutes!
What to Eat with Bread


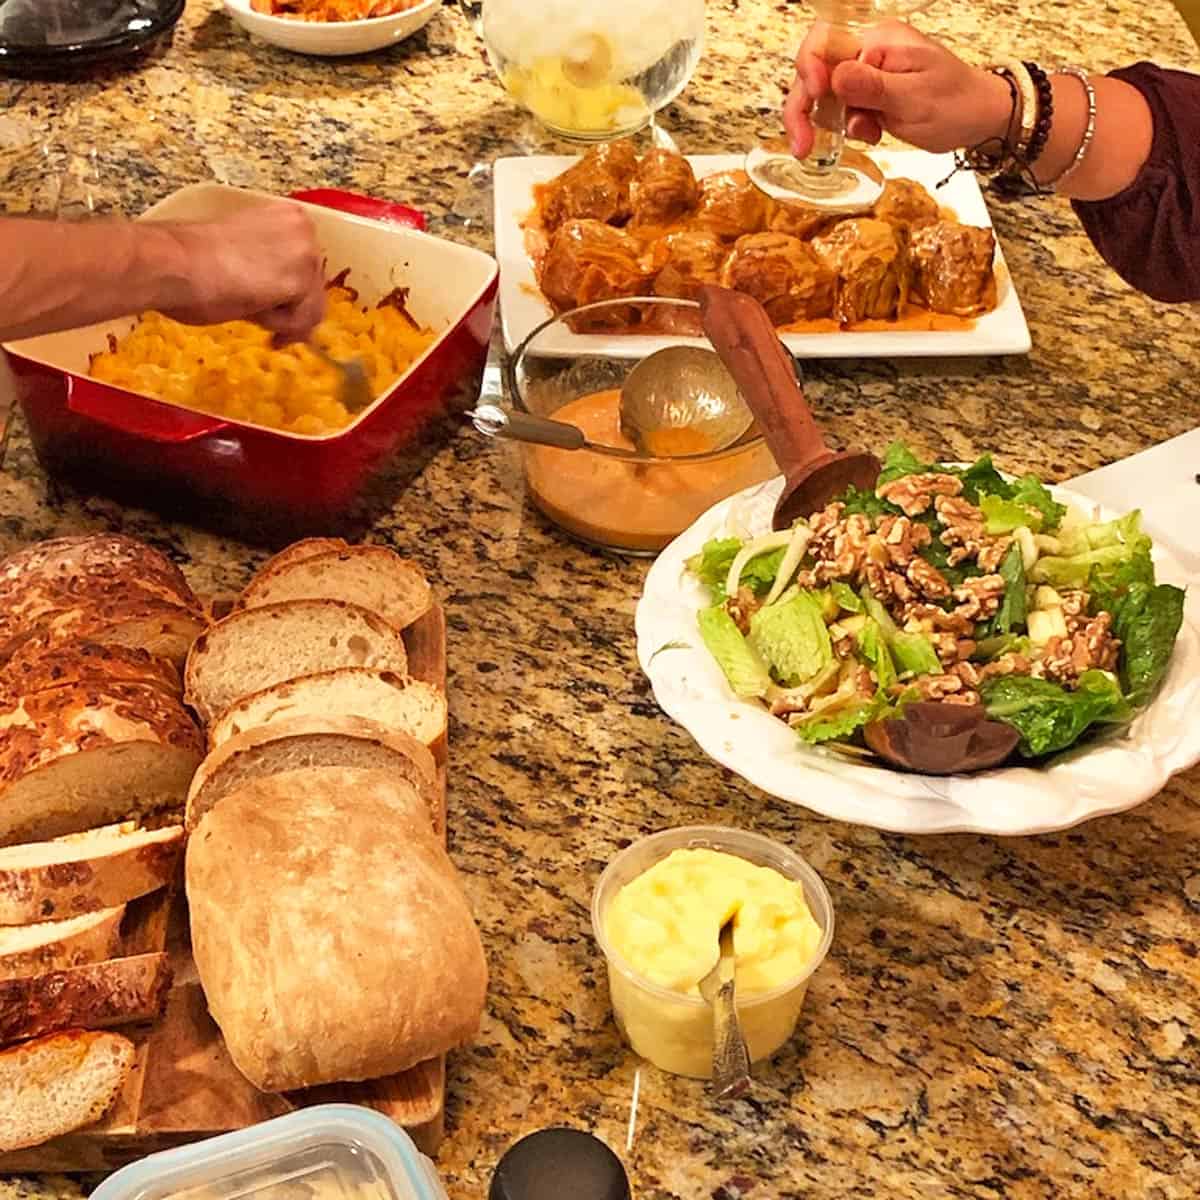
You can serve this homemade bread with virtually anything, from holiday meals to homemade soups and more. These are just a few of the things to serve with crusty bread.
It’s also a great way to add some freshness to leftover meals. Things like reheated enchiladas or a leftover chicken recipe. You can even use this for our easy air fryer turkey burgers. The possibilities are endless!
Finally, give our juicy air fryer brats a taste and use a slice of this bread to wrap around them. It’s a life-changing experience!
👨🍳 Tried this Recipe? Please leave a ⭐⭐⭐⭐⭐ rating in the recipe card below and leave a comment. We love hearing from our readers!
⏩ Stay in touch with us on social media by following us on Facebook, Pinterest, Instagram, and YouTube!
📬Get our Recipes delivered to your inbox for FREE!
Crusty Bread Recipe
Save This Recipe for Later (You’ll Want It Again)
⭐ Most readers end up making this in a few days.
Equipment
Ingredients
- 3.25 cups water, lukewarm, about 100° F.
- 1.5 tablespoon dry active yeast
- 6.5 cups flour, bread flour if you have it.
- 1.5 tablespoon kosher salt, (May use less if desired.)
Instructions
- Combine water and yeast and stir until the yeast is dissolved. Add flour and salt and mix until thoroughly combined.
- Allow the dough to rise for 2 hours at room temperature, covered with a kitchen towel.
- Apply a light dusting of flour over the dough and divide it in half and shape into 2 loaves, rounding the top. If you only want to make one loaf of bread at this time, store the unused dough in the refrigerator, covered, for up to 2 weeks until ready to use.
- Place the unbaked loaf(s) on pizza peel that is lightly dusted with cornmeal. Apply light dusting of flour over top and cut three slashes into top of dough, using a searrated knife. Cover dough with kitchen towel and allow to rest for 40 minutes.
- Preheat oven to 450° F with baking stone on the center rack. When bread is ready to go in the oven, slide the dough off pizza peel onto hot stone. Place 1 cup hot water into oven broiler (or other oven safe pan), on bottom wrack of oven. Quickly close oven door to created a steam bath within the oven. This will help produce a crisp outer crust.
- Bake for 30 minutes and allow to cool slightly before slicing. Enjoy!
Video
Notes
- Read all of the instructions first.
- Have all of the ingredients and kitchen tools laid out and ready before starting.
- Make sure your yeast is alive. Proof the yeast to be sure.
- Use a hot stone or skillet to bake your bread on.
- Know your oven and babysit the bread as it bakes.
- Rotate if necessary to ensure even baking.
- If your oven runs hot, adjust the temperature as necessary.
- Have patience while making homemade bread and take notes.
- What works well for you in terms of baking time, temperature, the wetness of dough, etc.
- Adjust the level of moisture to the unbaked bread as necessarey by adding a bit of flour if it is too wet, or a splash of water if it seems too dry.
- If you don’t have kosher salt, use one-half the amount of table salt. So, for this homemade bread recipe, about 3/4 tablespoon of table salt.
Nutrition
Nutrition information is automatically calculated, so should only be used as an approximation.
Troubleshooting this Recipe
Something not turning out right? Tell us what went wrong and we’ll help you fix it.
More Bread Recipes
Bread Recipes
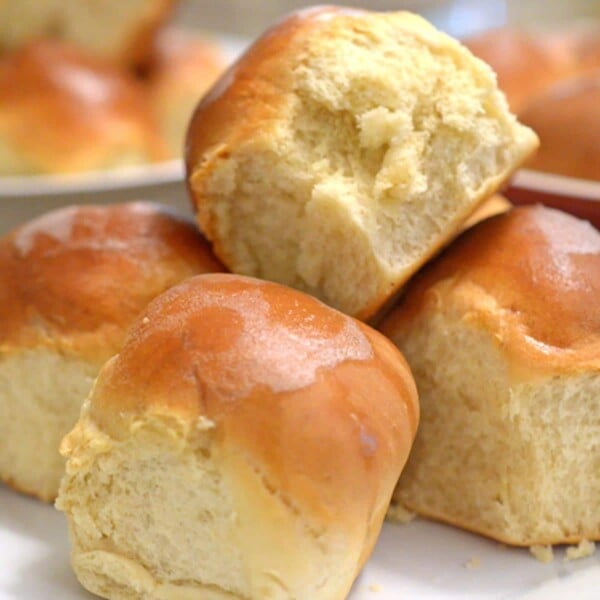
The BEST Homemade Dinner Rolls Recipe
Bread Recipes
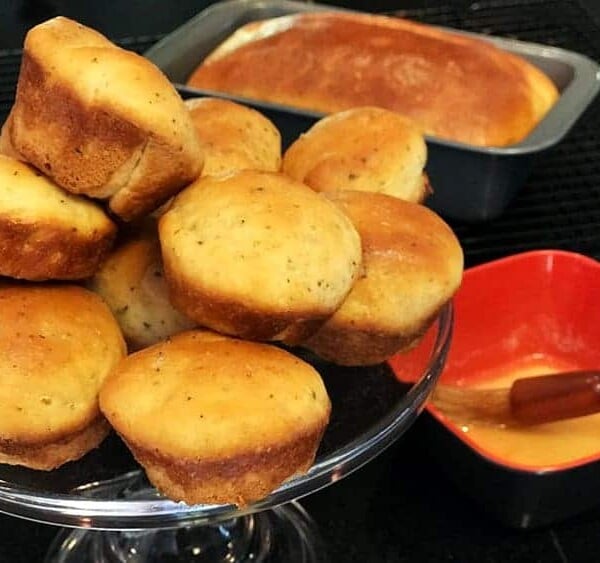
Easy Italian Herb Bread
Bread Recipes
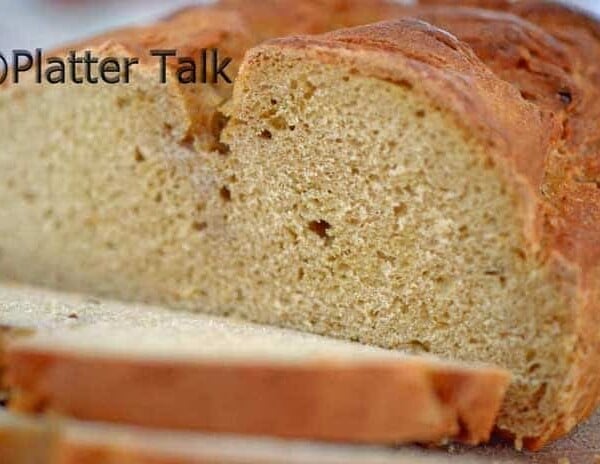
Swedish Limpa Bread
Sweet Breads


Has anyone used instant yeast?
Great question! Yes, you can absolutely use instant yeast in this recipe. Since instant yeast doesn’t need to be dissolved in water first like active dry yeast, you can mix it directly with the flour and salt before adding the lukewarm water.
A general rule is that instant yeast is more potent than active dry yeast, so you can use about 25% less if you’d like. In this case, that would be about 1 tablespoon of instant yeast instead of 1.5 tablespoons of active dry yeast. However, if you use the full amount, it will still work just fine—your dough may just rise a bit faster.
If you give it a try, let us know how it turns out. Happy baking! 😊🍞
I have made this many times it’s great
I have made this bread several times now and, I have to say, it’s my favorite crusty bread recipe. Especially if the dough has been refrigerated. I usually divide the dough in thirds, since it’s only my husband and me. I still get 3 very nice sized loaves. If anyone has had trouble making this, I would definitely advise trying it again. There is a learning curve to breadmaking. I used to make bread using a bread machine, and it took awhile to learn the technique for making it without one.
My question is whether or not this would make a good pizza crust. It seems to have the right texture.
Hello, we’ve used this recipe several times for pizza dough. On a side note, you can see our easy homemade pizza dough recipe here as well. Thanks for the great question!
I see no sugar in your recipe.I thought sugar activates the yeast along with the warm water.Would it hurt to add the sugar?
Thank you for the great question. Yes, you should add a pinch of sugar to the yeast when you are proving it. We will correct this in the post. Thank you again. Good luck with the bread!
If I save half for later do I start at step 4? First time making this, I’ve been looking for a single day bread recipe not quite prepared enough to prep overnight.
Yes, you can save half of the dough at step 4. Also, you can easily halve the recipe if you only want to make one loaf.
Can I bake in a regular loaf pan?
Sure. Just lower the temp by 25 degrees.
I am F A R from being a master baker BUT I can read instructions. I write instructions every day for a herd of small children.
There is a part in every bread recipe that trips me up – activating the yeast and the amount of water a recipe calls for. For example – this recipe: It calls for 3.25 cups of water – do I activate the yeast in this 3.25 cups or do what the can says and activate it in 1/4 cup of 100 degrees water with a teaspoon of sugar? Is the 1/4 cup of water part of the 3.25 cups of water?
Look at steps 1-2 and pretend you have never made bread before.
If someone in the universe could school me on this – I would be grateful. I like making bread – just want to do it well.
Hi P. Beck. Don’t overthink it. In this post, you will find a photo that shows the yeast being activated. Clearly this is not being done in 3 cups of water. I suggest using 1/4 cup of water, or less, to activate the yeast. Just be sure the total amount in the recipe is 3.25 cups. Importantly, this amount may need to be adjusted as you are working your dough. As mentioned in the post, it is all about the texture of the dough. If it seems to wet, you need to add a bit more flour. Conversely, if it is too dry, you need to add a splash of water. Don’t get caught up in the numbers as you are likely used to doing when addressing your herd of children. This is the art of baking.
Lots of information in your recipe. I cut the recipe in half and made only one loaf. It was a hit! I baked it on a pizza stone at 400 for 25 minutes. Results were beautiful!
Excellent work and thanks for the awesome feedback!